
On this page
a. Export (Download)
Scanlily's Export features (also called Download) allows you to create backups of your inventory data and access it outside of Scanlily.
All subscribers, whether free or part of a paid subscription, can export data without images via the Scanlily Spreadsheet on the User Website. Business website users can also export all content to a ZIP file on their local drive.
To export your inventory data, you'll need to access the Scanlily User Website:
- Navigate to www.scanlily.com and click "Login" in the upper right
- Use the same credentials you use for the mobile app
- Once logged in, click "My Items" in the navigation menu
You'll see three view options:
- App View
- Spreadsheet View
- Inventory View
The Spreadsheet View provides export capabilities for all users, while Pro and Business subscribers have additional export options.
1. Spreadsheet Export
All Scanlily users, including Free subscribers, can export their inventory data to CSV format:
- From "My Items," select "Spreadsheet View"
- You'll see your items displayed in a spreadsheet format
- Click the checkbox next to "Item Name" to select all items, or select individual items by clicking their checkboxes
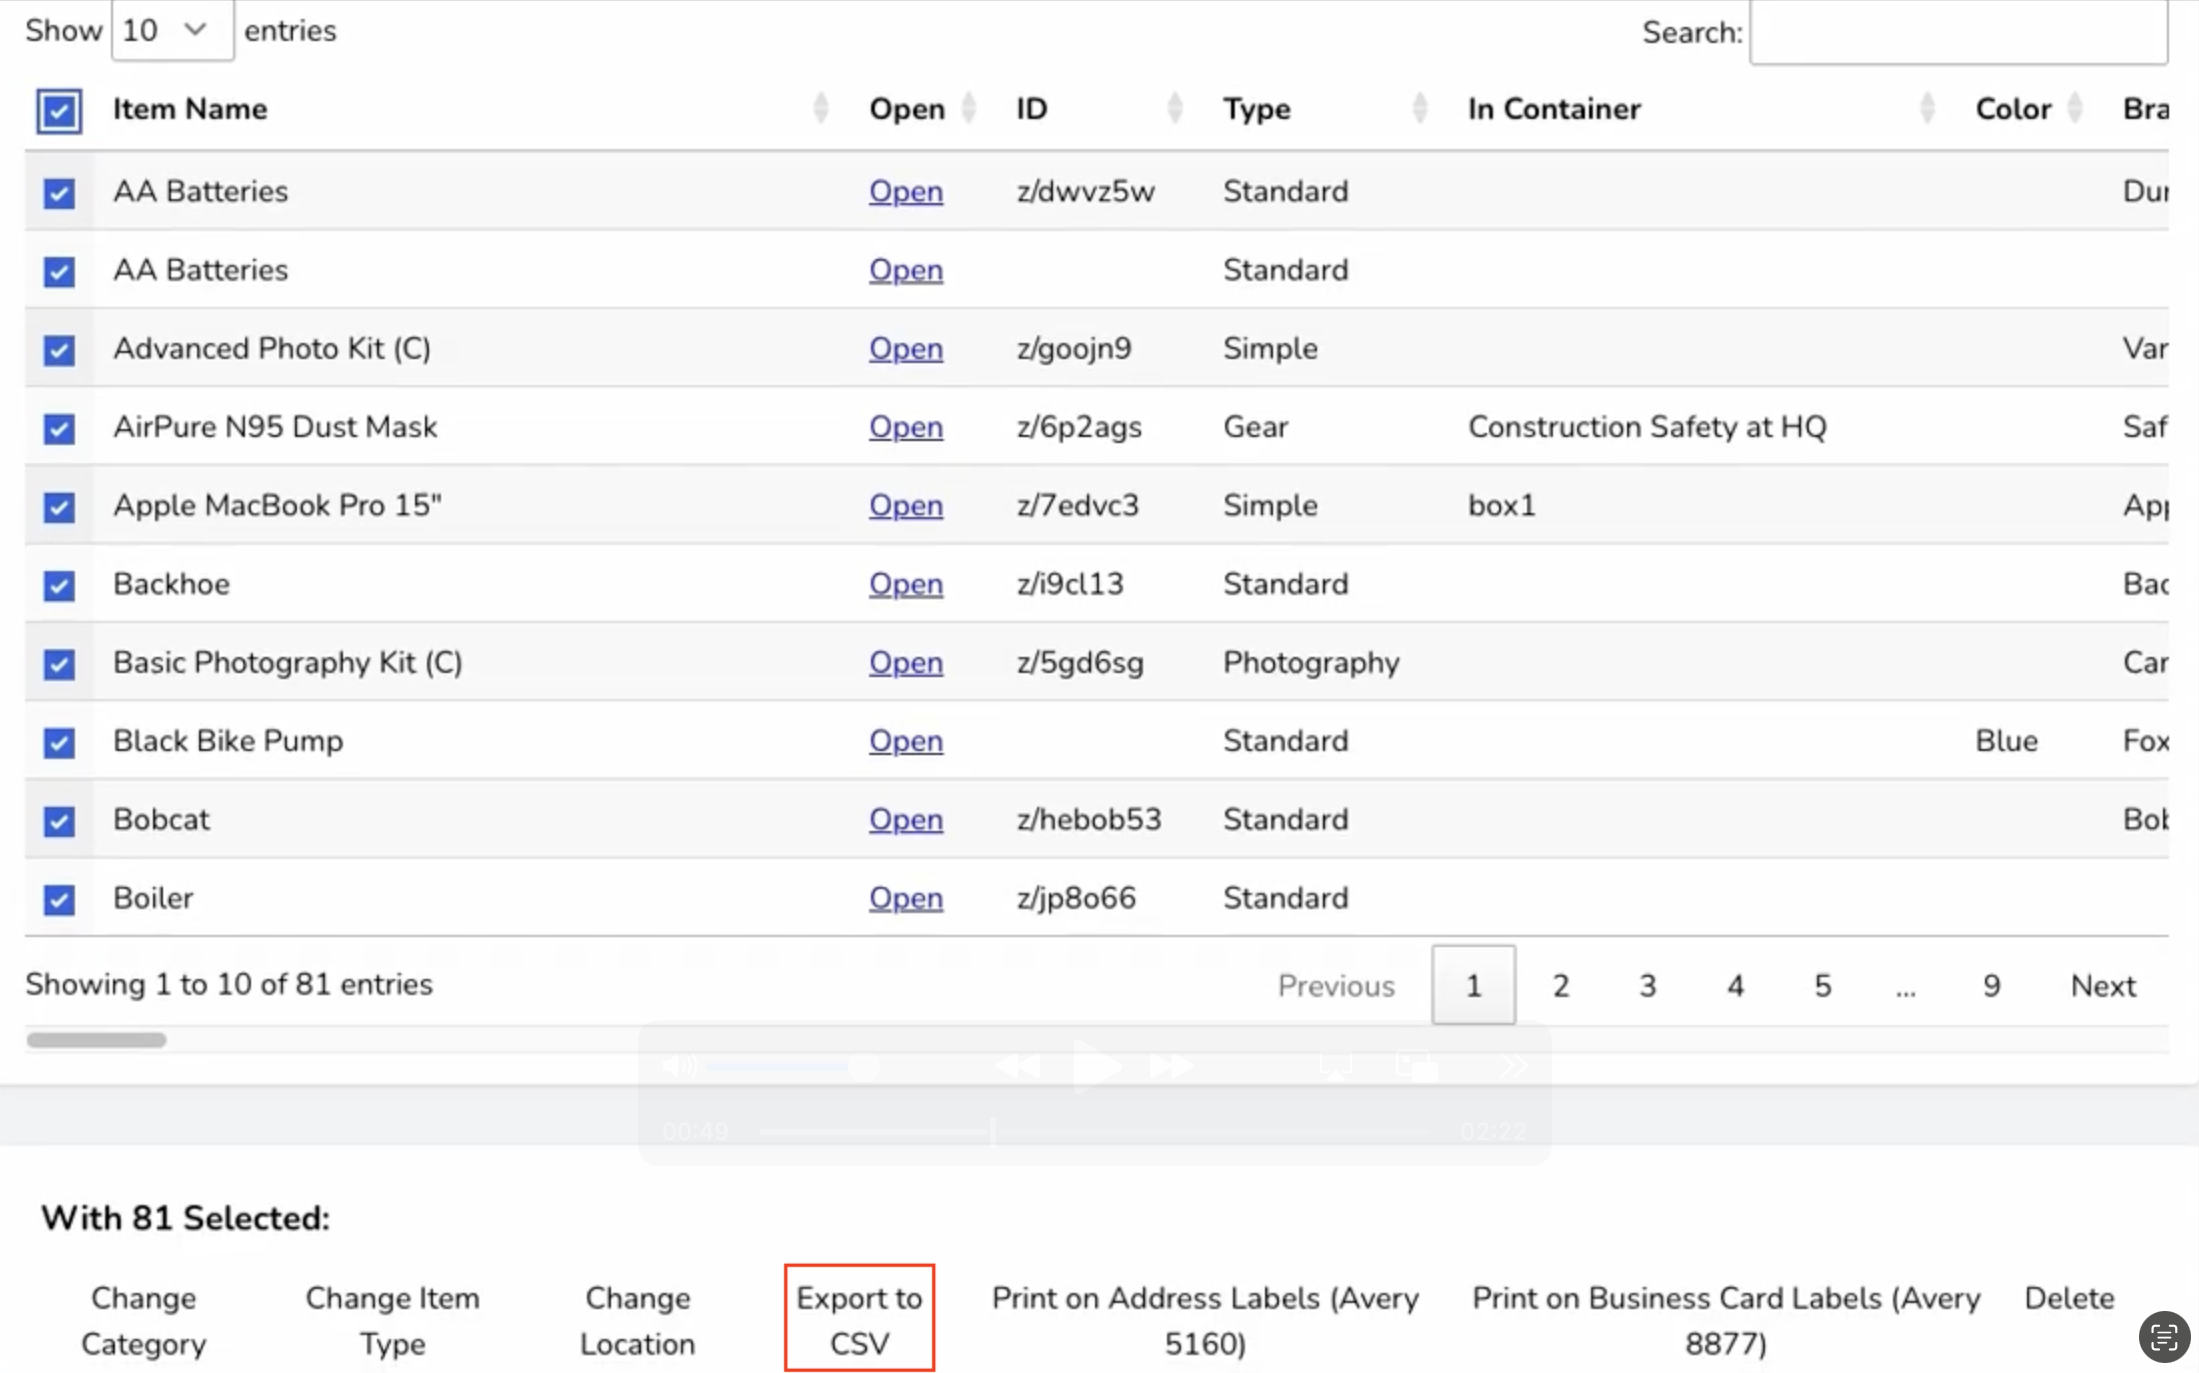
- With your items selected, click "Export to CSV" from the action menu
- A CSV file will download containing all field values for your selected items
Note: This CSV export includes all your item data and field values but does not include images or file attachments. For complete data export including media files, you'll need a Pro or Business subscription.
2. Full Inventory Download. HTML and JSON.
2a. Export Process
Paying subscribers have access to comprehensive export functionality that includes all data, images, and attachments:
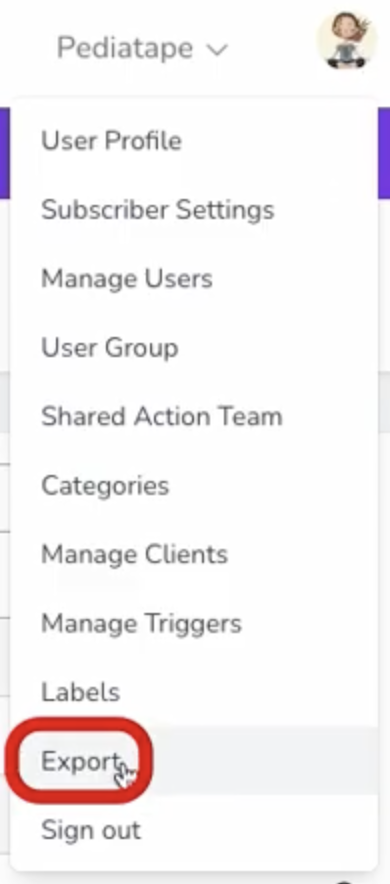
- When logged into the User Website, click on your profile icon in the upper right corner
- Select "Export" from the dropdown menu
- On the Inventory Export (Download) page, you'll see information about your inventory files
- Click the "Refresh Files" button to prepare your data for download
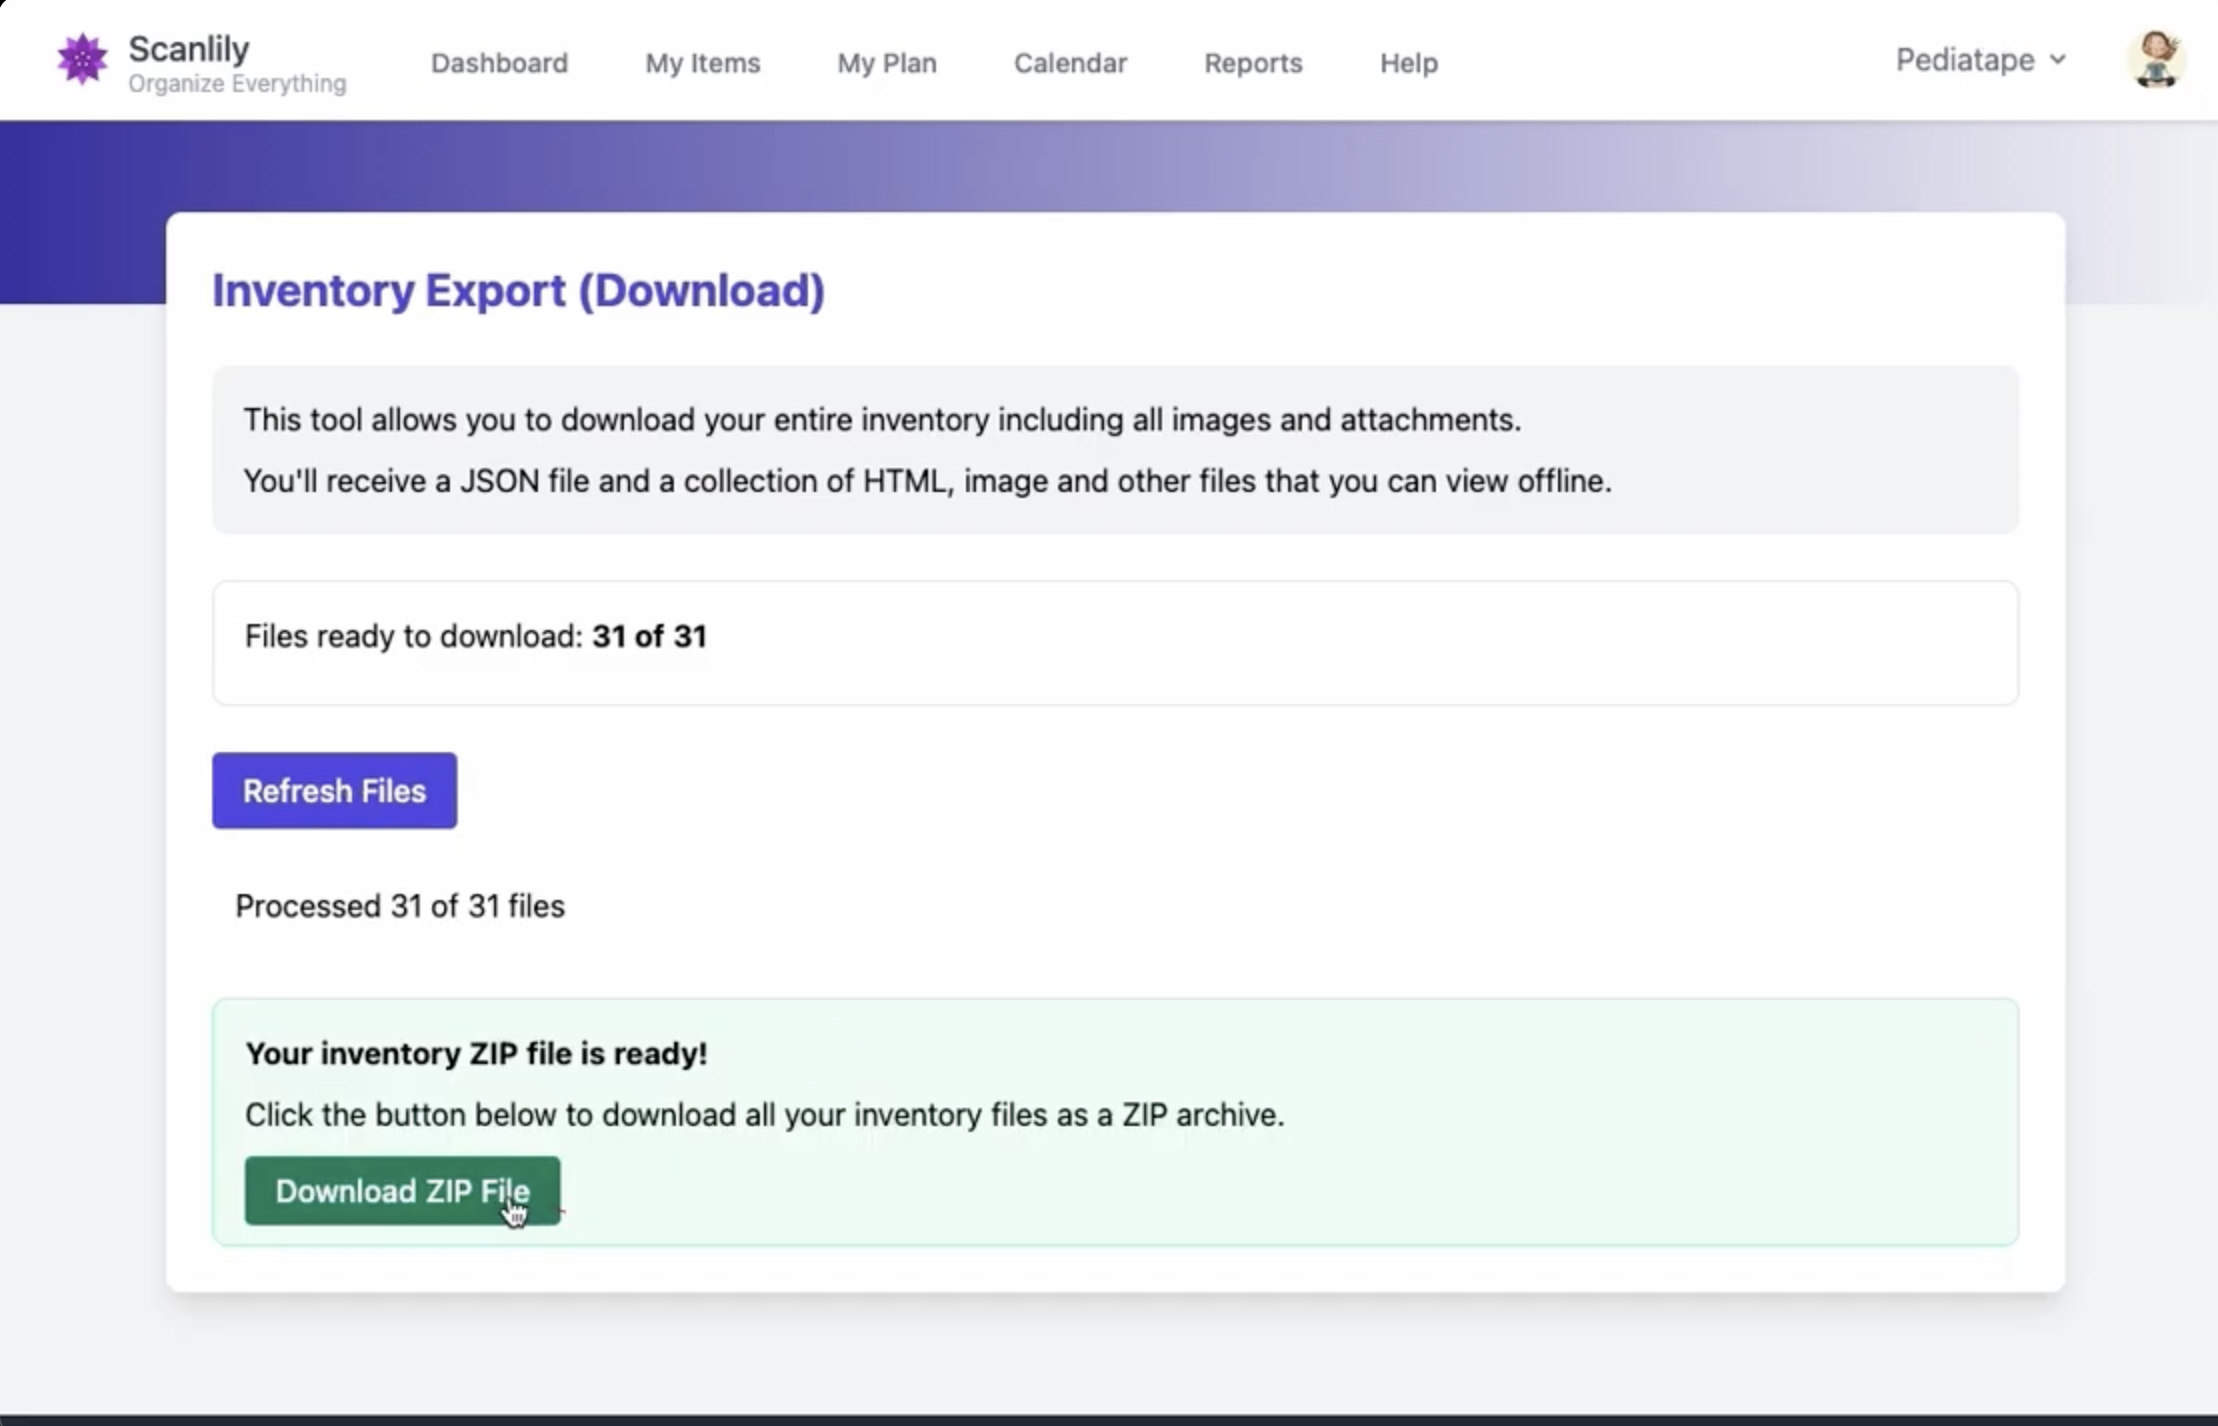
- Once processing is complete, click "Download ZIP File" to download your entire inventory as a ZIP archive
The system will compile all your inventory data, images, attachments, and create structured HTML pages for offline viewing.
The ZIP file contains a complete, structured copy of your inventory:
Folder Structure:
/image/- Contains all item images/attachment/- Contains all file attachments/audio/- Contains any audio files/details/- Individual HTML pages for each iteminventorypages.html- Main inventory browse pageinventory.json- Complete data in JSON format
2b. HTML Export
HTML Inventory Pages: When you open inventorypages.html from your downloaded ZIP, you'll see a fully functional offline version of your inventory:
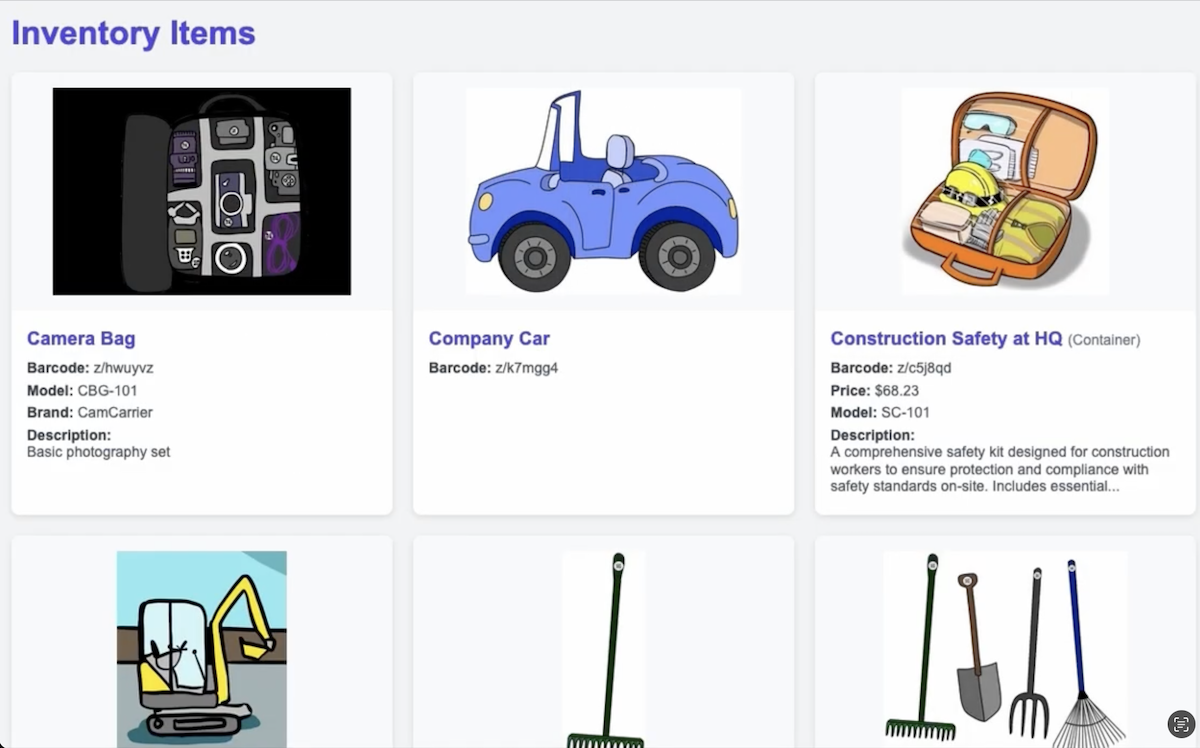
- Browse all your items with images
- Click on containers to see their contents
- View complete item details
- Navigate between pages if you have many items
- All images and data are stored locally
2c. JSON Export
JSON Data File: For developers or advanced users, the inventory.json file contains all your structured data:
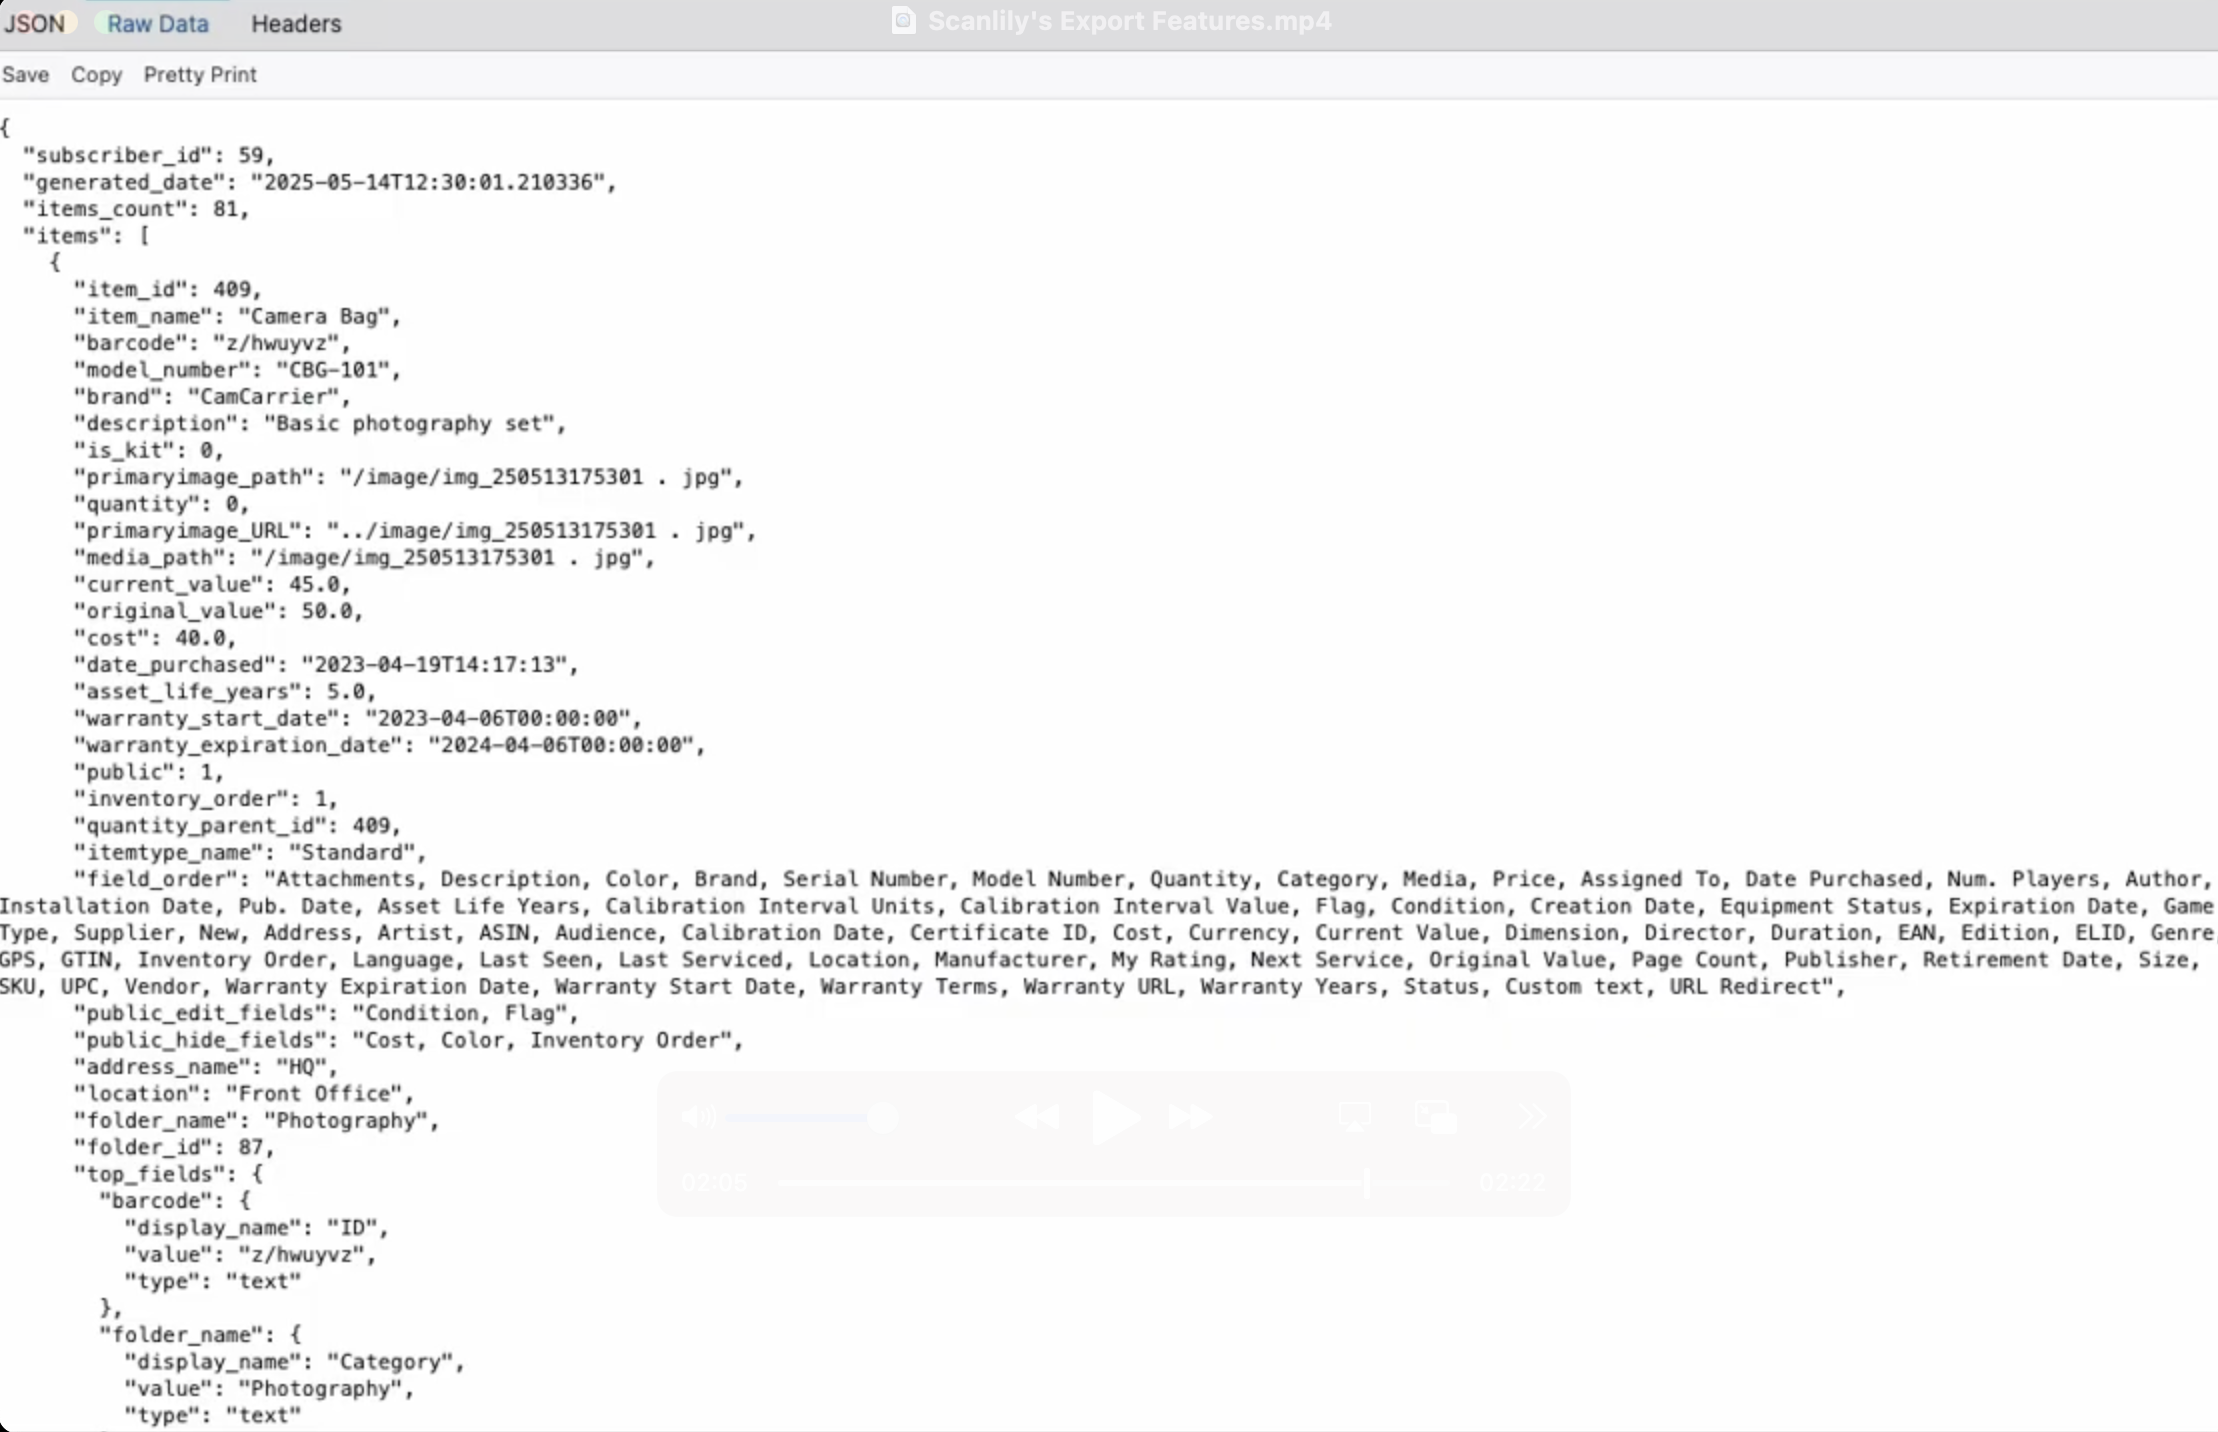
This JSON file includes:
- Complete item information
- All field values and attributes
- Container relationships
- Image references
- Attachment information
2d. Working with Exported Data
For Backup Purposes:
- Store the ZIP file in a secure location
- The complete folder structure preserves all relationships
- Can be opened and browsed offline anytime
For Data Analysis:
- Use the CSV export for spreadsheet analysis
- Import JSON data into other applications
- Parse structured data programmatically
For Migration:
- JSON format allows importing into other systems
- Images are preserved with their original names
- All relationships and hierarchies are maintained
b. Import
Scanlily offers two import options for adding inventory data: Quick Import for simple CSV-based imports, and Structured Import for comprehensive JSON-based imports with full feature support.
To access import features, log into the User Website and click on your profile icon in the upper right corner, then select "Import" from the dropdown menu.
1. Quick Import (CSV)
Quick Import is available to all Business subscribers and provides a simple way to import inventory data from a CSV file.
Supported Features:
- Import items with 62 standard fields (item name, image_url description, price, dates, etc.)
- Create new Categories automatically
- Create new Locations at your primary address
- Mark items as Containers
- Import barcodes and product codes (UPC, EAN, SKU, etc.)
- Images are uploaded via URL and are copied to Scanlily's cloud server allowing migration away from other platforms
- Maximum 1,000 rows per import
- Undo capability to reverse an import
Limitations:
- Custom attributes are not supported
- Multiple addresses are not supported (locations created at primary address only)
- Item-container assignments (placing items inside containers) are not supported
How to Use Quick Import:
- From the Import page, click "Continue" under Quick Import
- Download one of the CSV templates (Basic with 10 common fields, or Complete with all 62 fields)
- Fill in your data using the template. Field names in the first row must match exactly (case-sensitive)
- Upload your CSV file and click "Upload & Validate"
- Review the preview and any new categories or locations that will be created
- Click "Import Items" to complete the import
Date Format: Use YYYY-MM-DD format for all dates (e.g., 2024-03-15).
Boolean Fields: For fields like is_kit and public, use Y, Yes, or 1 for true; N, No, or 0 for false.
2. Structured Import (JSON)
Structured Import is available to subscribers with API access enabled (an additional paid feature) and provides comprehensive import capabilities using JSON format.
Supported Features:
- All standard item fields
- Images and file attachments
- Custom attributes
- Multiple addresses
- Item-container assignments (parent_id relationships)
- Item types with custom field configurations
The JSON file format matches the structure of the inventory export, making it easy to migrate data between Scanlily accounts or restore from a backup.
How to Use Structured Import:
- From the Import page, scroll to the Structured Import section
- Select your JSON file (must match the Scanlily export format)
- Click "Import Items" to begin the import process
- Review the results showing successful imports and any errors
Contact Us if you would like to enable Structured Import for your account.
3. Import Log
The Import Log section on the Import page displays a history of all your previous imports, showing:
- Import date and time
- Number of items imported
- Number of categories created
- Number of locations created
Each import has an "Undo" button that allows you to reverse the import, deleting all items, categories, and locations that were created. Use this feature with caution, as any changes you've made to imported items since the import will also be lost.