
On this page
When you're managing inventory across multiple buildings, rooms, aisles, and shelves, knowing an item is at a warehouse or building is not enough, especially if you have hundreds or thousands of items or boxes stored. Scanlily just launched Navigate, a feature that allows you to find your items at their specific aisles, bays and shelves!
Instead of using multiple filters, you now have a visual location structure that allows you to drill down through your inventory by location hierarchy, from broad locations (like "Headquarters") down to specific aisles, bays and shelves, to see exactly what items are stored where.
And the best part? As you navigate, the item list below updates to show only what's at that location. Here's how it works:
Launch the Navigate feature
On Scanlily, you can access the Navigate feature through the Navigate button or through the Location button.
Via the Navigate button
Step 1: Access the Navigate feature
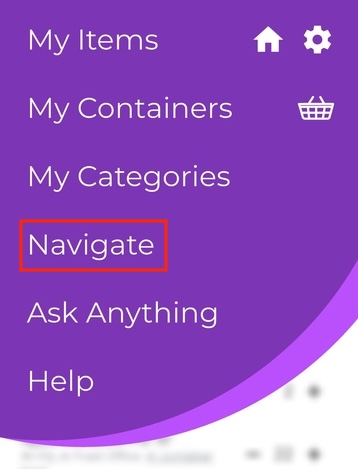
After clicking the upper left menu, click on the Navigate button to launch the tool:
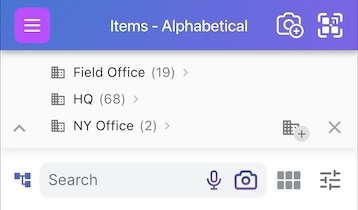
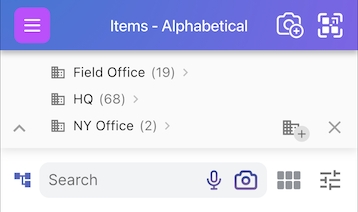
Clicking the Navigate button opens up your items list and gives you your first view of your navigation panel with your broadest locations, e.g. 'warehouse', 'headquarters' or say 'NY Office' displayed first:
Via the Location hierarchy button
Alternatively, you can access the Navigate feature by clicking it in your overall Items list.
Step 1: Head to your Items list
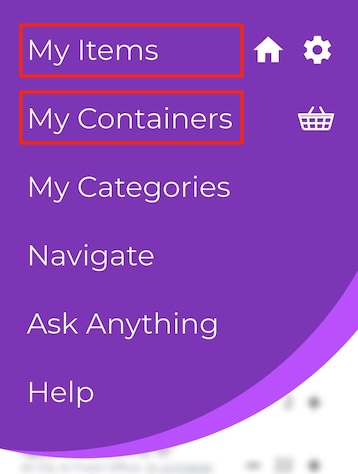
After logging in to your Scanlily account, click on the three-bar menu at the top left and click on My Items or My Containers:
Step 2: Click on the Location icon
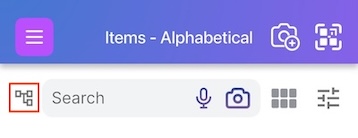
After accessing your items' list, click on the new Location icon exactly beside the items search bar:
This launches the same navigation panel with your addresses listed:
Scanlily shows you the number of items at each address, and from here, you can…
Drill down your navigation panel to find items
Our navigation panel gives you a visual overview of the location hierarchy of each item.
At the broadest level is your address, think buildings and properties. After clicking the address, Navigate will take you to the location (room) in your broad address. And after clicking the location, you'll see the aisles and bays and then finally, shelves to see specific positions of items after clicking those.
These fields create a hierarchy that allow you to find items conveniently in this order: Address (Site) ➤ Location (Room) ➤ Aisle ➤ Bay ➤ Shelf ➤ Container ➤ Item
Each level is optional. For example, you can have just the following:
Address ➤ Location ➤ Shelf ➤ Item
Here's how to 'drill down' your items' list based on where they're located:
Step 1: Start with a high-level location
By default, Scanlily's navigate will launch and show your highest level, addresses first.
If you need to add a new address, click the Address+ button to the left of the X (Clear) button. Otherwise, click on any address to drill down, say HQ, in this case:

Step 2: Scan your sub-level locations
After clicking on the broader location, Scanlily will show you your locations just below that broader location, and attach the exact number of items at each sub-location to the name. If you need to add a new location, click on the Location+ button to the left of the X:
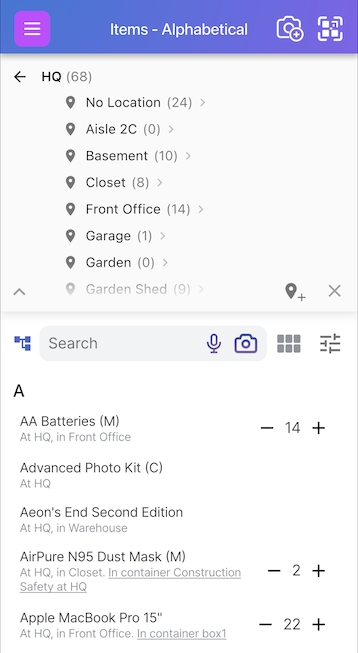
Just below the location hierarchy, you'll also see all the items at that location.
Step 3: Tap a sub location to drill deeper
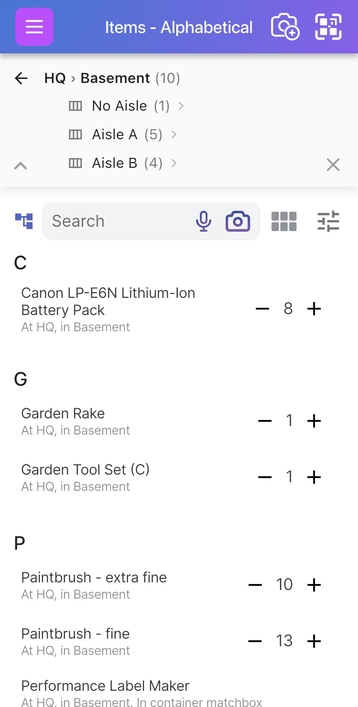
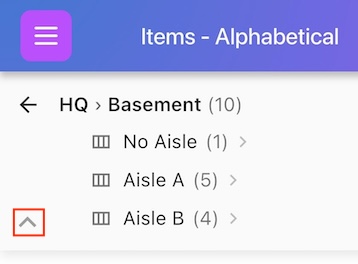
To go even deeper, tap on any of your sub locations - in this case, if we clicked on Basement nested under HQ, we can now see the aisles in the basement and the items list updates to only include items in the basement - 10 in total in this example:
Step 4: Drill down to the aisle and shelf
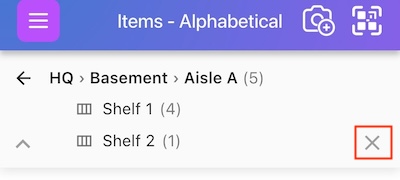
If we clicked on Aisle A, the shelves there - shelf 1 and shelf 2, total items - 5, and how they're split between shelves are shown:
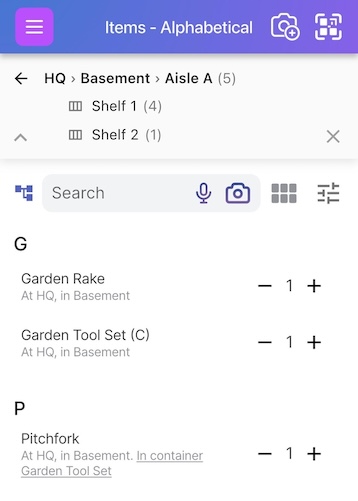
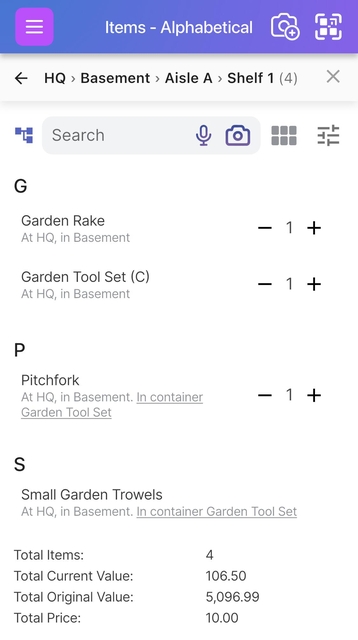
You can now drill further by clicking on the particular shelf, say Shelf 1, and can see the items in Aisle A, Shelf 1:
The above example had shelves and aisles but no bays. You can customize Scanlily to meet your own hierarchical needs. The following show bays as well:

Scanlily's Navigate breadcrumb
As you navigate, the hierarchy stays visible at the top, showing you your current path, and giving you a visual overview of your location hierarchy.
For example, at Aisle A, Bay Left, Shelf 1, we can see our path:
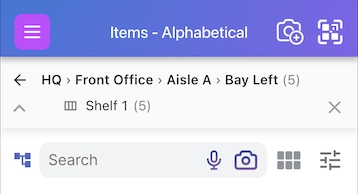
HQ > Front Office > Aisle A > Shelf 1
Terminating Scanlily's Navigate
While drilling down your inventory list, at any point down the path, you can click on the 'X' to close the path and return to the list of all items:
Minimizing the Navigate panel
When you have many items in your inventory and several location levels, as you drill down, the Navigate panel can start to take up screen space, leaving less room for your item list.
At any point down your path, you can click the 'arrow up' button at the bottom left of the navigate panel:
After you click it, the panel minimizes but your location filter stays active, so you'll still see only items at the selected location.
After collapsing the navigate panel, you'll also still see item count at your current location level without expanding the full panel and you'll see more of your items at that level or location.
Adding items while navigating
One of the best functionalities that comes with the navigate feature is that when you navigate to a specific location and add new items, they automatically inherit that location.
For example:
If we navigated to HQ > Basement > Aisle A > Shelf 1
And then you add an item with your Scanlily QR sticker or without a QR using the two buttons at the top right:
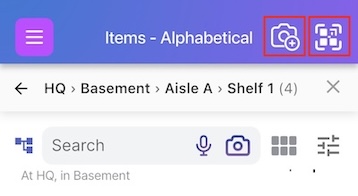
Tapping the camera plus button allows you to add an item to your inventory even before you get your Scanlily QR stickers, so you link them later.
The QR button allows you to add items by scanning your Scanlily QR stickers and then taking photos or videos of them. Our AI will analyze the photos of videos and create a separate inventory entry for each item, with photo frames attached, in less than a minute!
With our navigate feature, instead of manually setting location fields for each item, you navigate once to where they're located and all new items get the correct location automatically.
If you're cataloging entire aisles, bays or shelves, you can take advantage of Scanlily's navigate and add multiple items without repeating location data.
Using Scanlily's Navigate with multiple customers (businesses managing client inventory)
If you're a Scanlily user managing inventory for several customers, you'll need to filter your item list by customer first before you start navigating, so you see only their own items.
Do this by clicking on the Search text area in the item list or container list and then selecting the Customer pulldown: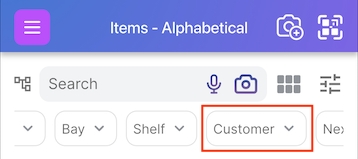
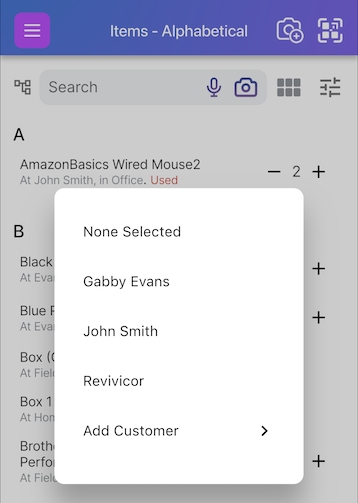
Select the customer:
And thereafter, the customer will stay set as you navigate around the rest of the app until you choose to clear the customer:
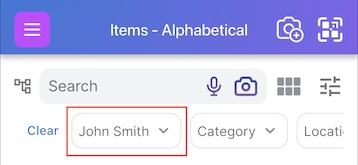
Now when you click the Navigate button, it will open up to your customer's specific addresses and locations:

You'll only see their own items. Added items to a location under that customer also inherit the location automatically.
That's it!