
On this page
a. Selecting and modifying Item Types
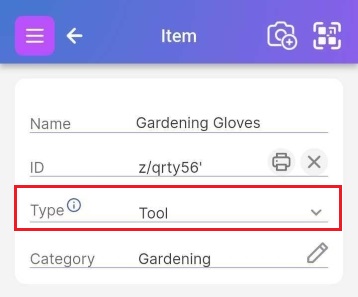
An Item’s Item Type is designated by “Type” on the Item Page. You can click on it to see all the available Item Types:
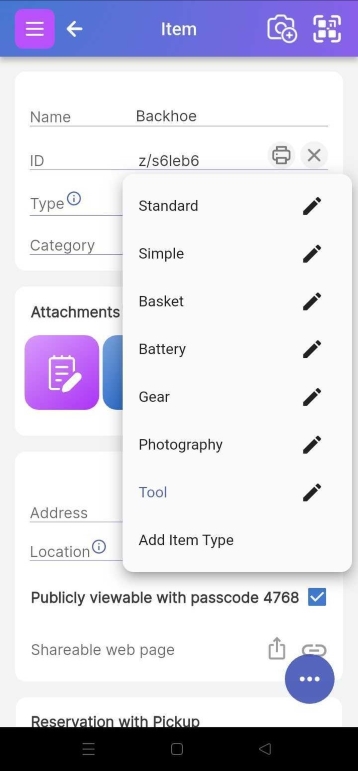
If you have the proper user role, you can change the Item Type by selecting it from that dropdown. As soon as you do, a different set of attributes appears. Importantly, hidden attributes retain their data, so you don’t have to worry about changing an item accidentally. To see the hidden attributes and their values again, you can add them back to the item type.
You can also change the attributes shown for that Item Type in three ways:
1. Change attribute list by clicking on the down arrow next to the Type field.

<img src="/help/images/bottom_floating_button.jpg" alt="Image of bottom right menu in an opened state. Note that there is no Add to Container option. Add to the container by selecting under the 'Add items to container' section of the Container page." data-id="0048" />
3. Selecting Item Types from the Settings menu
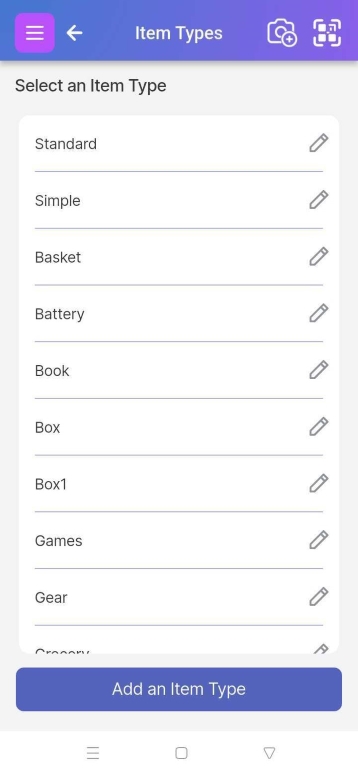
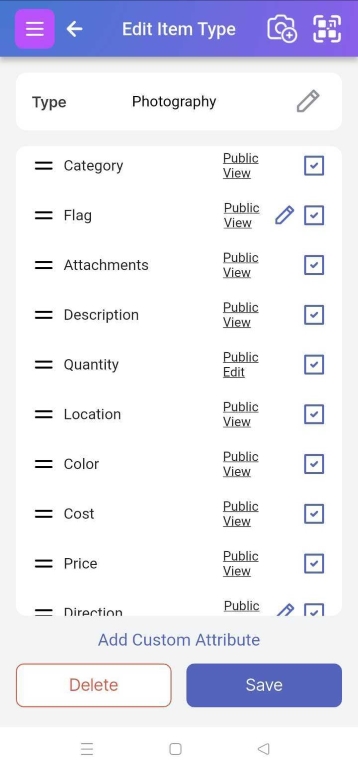
All three methods will take you to the Item Type page that lists the attributes for the selected Item Type.
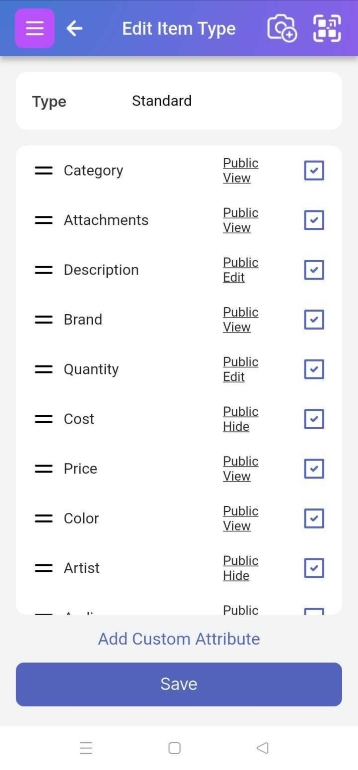
Click the checkboxes for those attributes you want to display for this Item Type.
b. Reordering and Changing Attributes
Press, hold, and move attributes up and down depending on the order you’d like them to appear on the Item Page.
c. Creating Custom Attributes
You can define custom attributes by clicking on the "Add Custom Attribute" button on the Edit Item Type page:
It will take you to the Edit Custom Attribute page.
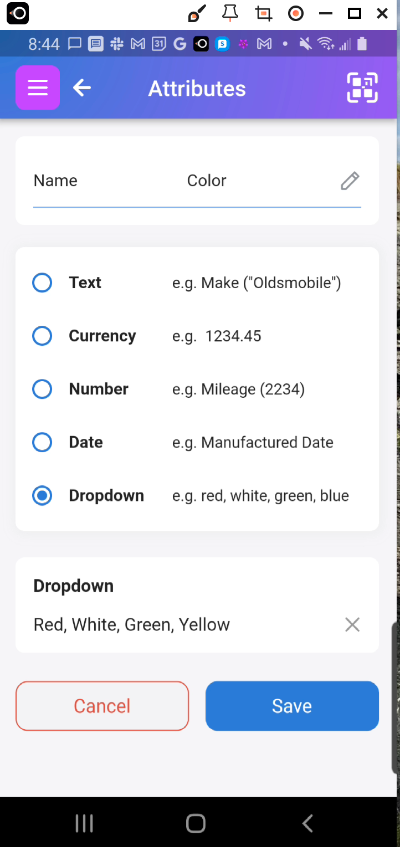
The current data types are Text, Currency, Number, Date, and Dropdown. The first four are self-explanatory. “Dropdown” creates a selectable list for the user to choose from. You can add the elements of a dropdown by separating them by commas. For example, the custom attribute “color” could have the attributes “Red, White, Green, Yellow,”
d. Making Attributes Publicly Viewable or Editable
When an item is publicly viewable, that means anyone can access them, even those who don't have an account on the system and/or do not have the app installed. They can do so by scanning the Scanlily QR Label for the item with their phone's camera. This will bring up a web page with the specified fields made available to them. It is also possible for you to Share the item in several ways in the app and mobile site.
A paying subscriber Superuser or Administrator can customize which iof the item’s attributes are publicly visible and are not by clicking on the Public View links from the Edit Item type page and toggling between the options. In the below example, public viewers will see the item's name (assumed), Description and Category. They will be able to change the quantity since it has the Public Edit enabled. Perhaps the viewer is a worker who updates nothing but quantities in a warehouse. In this example, the Cost and Address attributes are hidden.
