
On this page
a. Export (Download)
Scanlily's Export features (also called Download) allows you to create backups of your inventory data and access it outside of Scanlily.
All subscribers, whether free or part of a paid subscription, can export data without images via the Scanlily Spreadsheet on the User Website. Business website users can also export all content to a ZIP file on their local drive.
To export your inventory data, you'll need to access the Scanlily User Website:
1. Navigate to www.scanlily.com and click "Login" in the upper right
2. Use the same credentials you use for the mobile app
3. Once logged in, click "My Items" in the navigation menu
You'll see three view options:
◦ App View
◦ Spreadsheet View
◦ Inventory View
The Spreadsheet View provides export capabilities for all users, while Pro and Business subscribers have additional export options.
1. Spreadsheet Export
All Scanlily users, including Free subscribers, can export their inventory data to CSV format:
1. From "My Items," select "Spreadsheet View"
2. You'll see your items displayed in a spreadsheet format
3. Click the checkbox next to "Item Name" to select all items, or select individual items by clicking their checkboxes
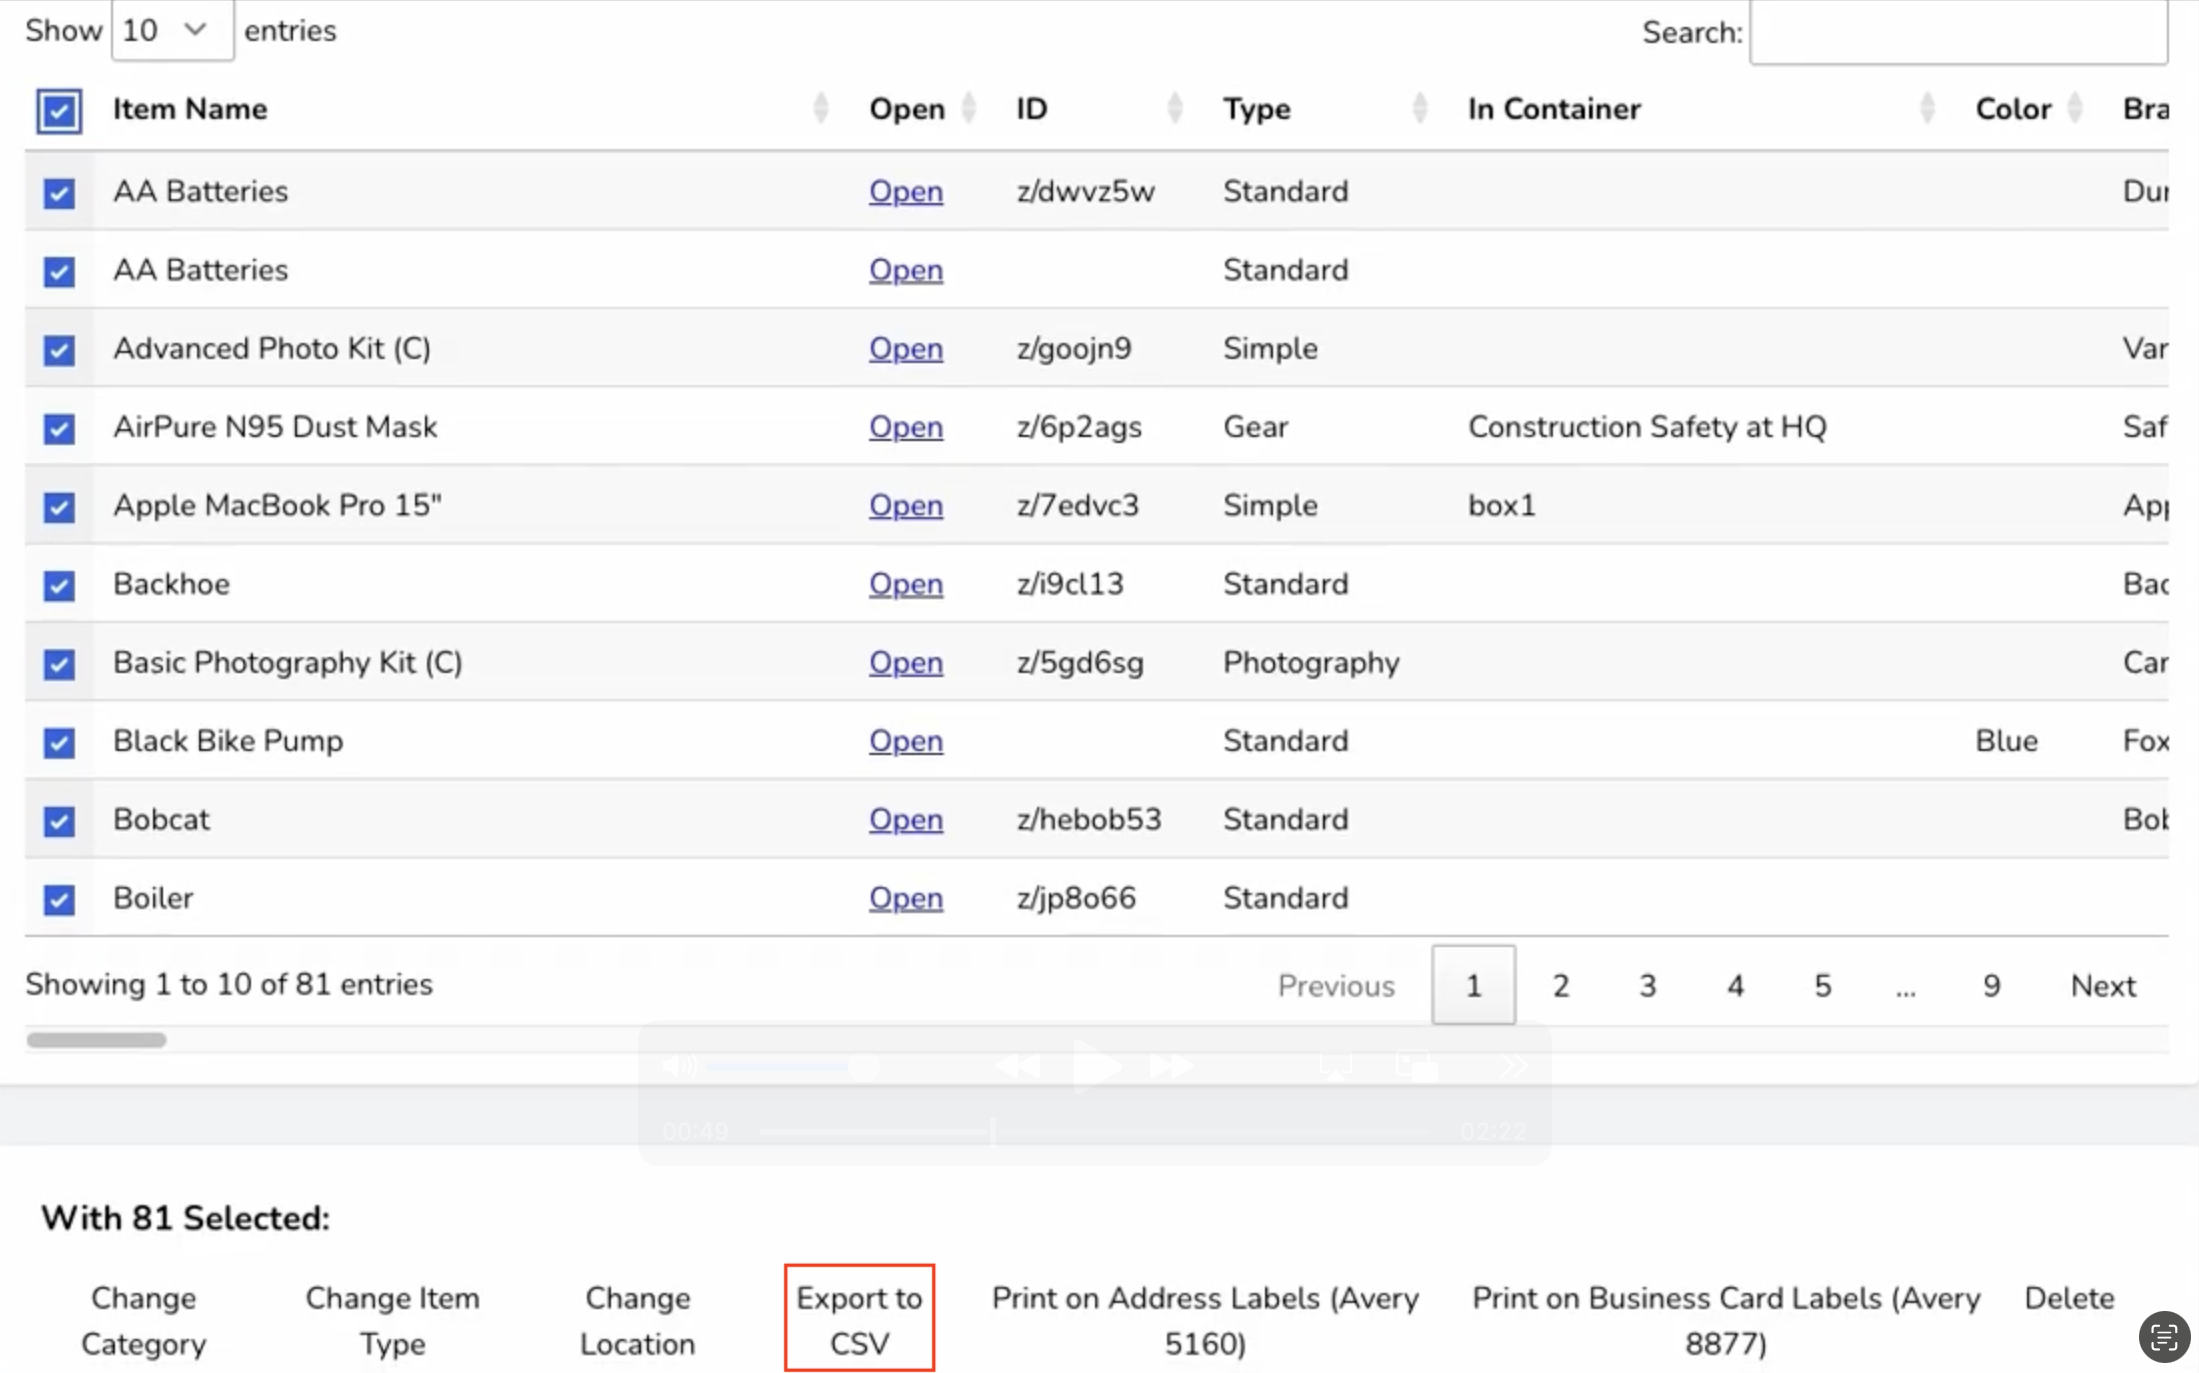
4. With your items selected, click "Export to CSV" from the action menu
5. A CSV file will download containing all field values for your selected items
Note: This CSV export includes all your item data and field values but does not include images or file attachments. For complete data export including media files, you'll need a Pro or Business subscription.
2. Full Inventory Download. HTML and JSON.
2a. Export Process
Paying subscribers have access to comprehensive export functionality that includes all data, images, and attachments:
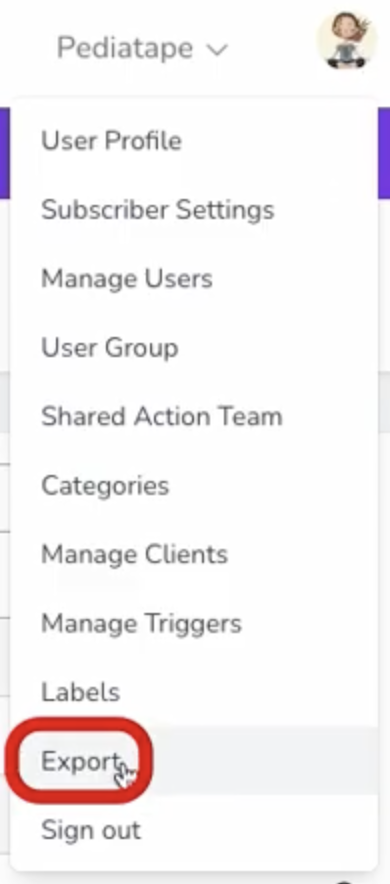
1. When logged into the User Website, click on your profile icon in the upper right corner
2. Select "Export" from the dropdown menu
3. On the Inventory Export (Download) page, you'll see information about your inventory files
4. Click the "Refresh Files" button to prepare your data for download
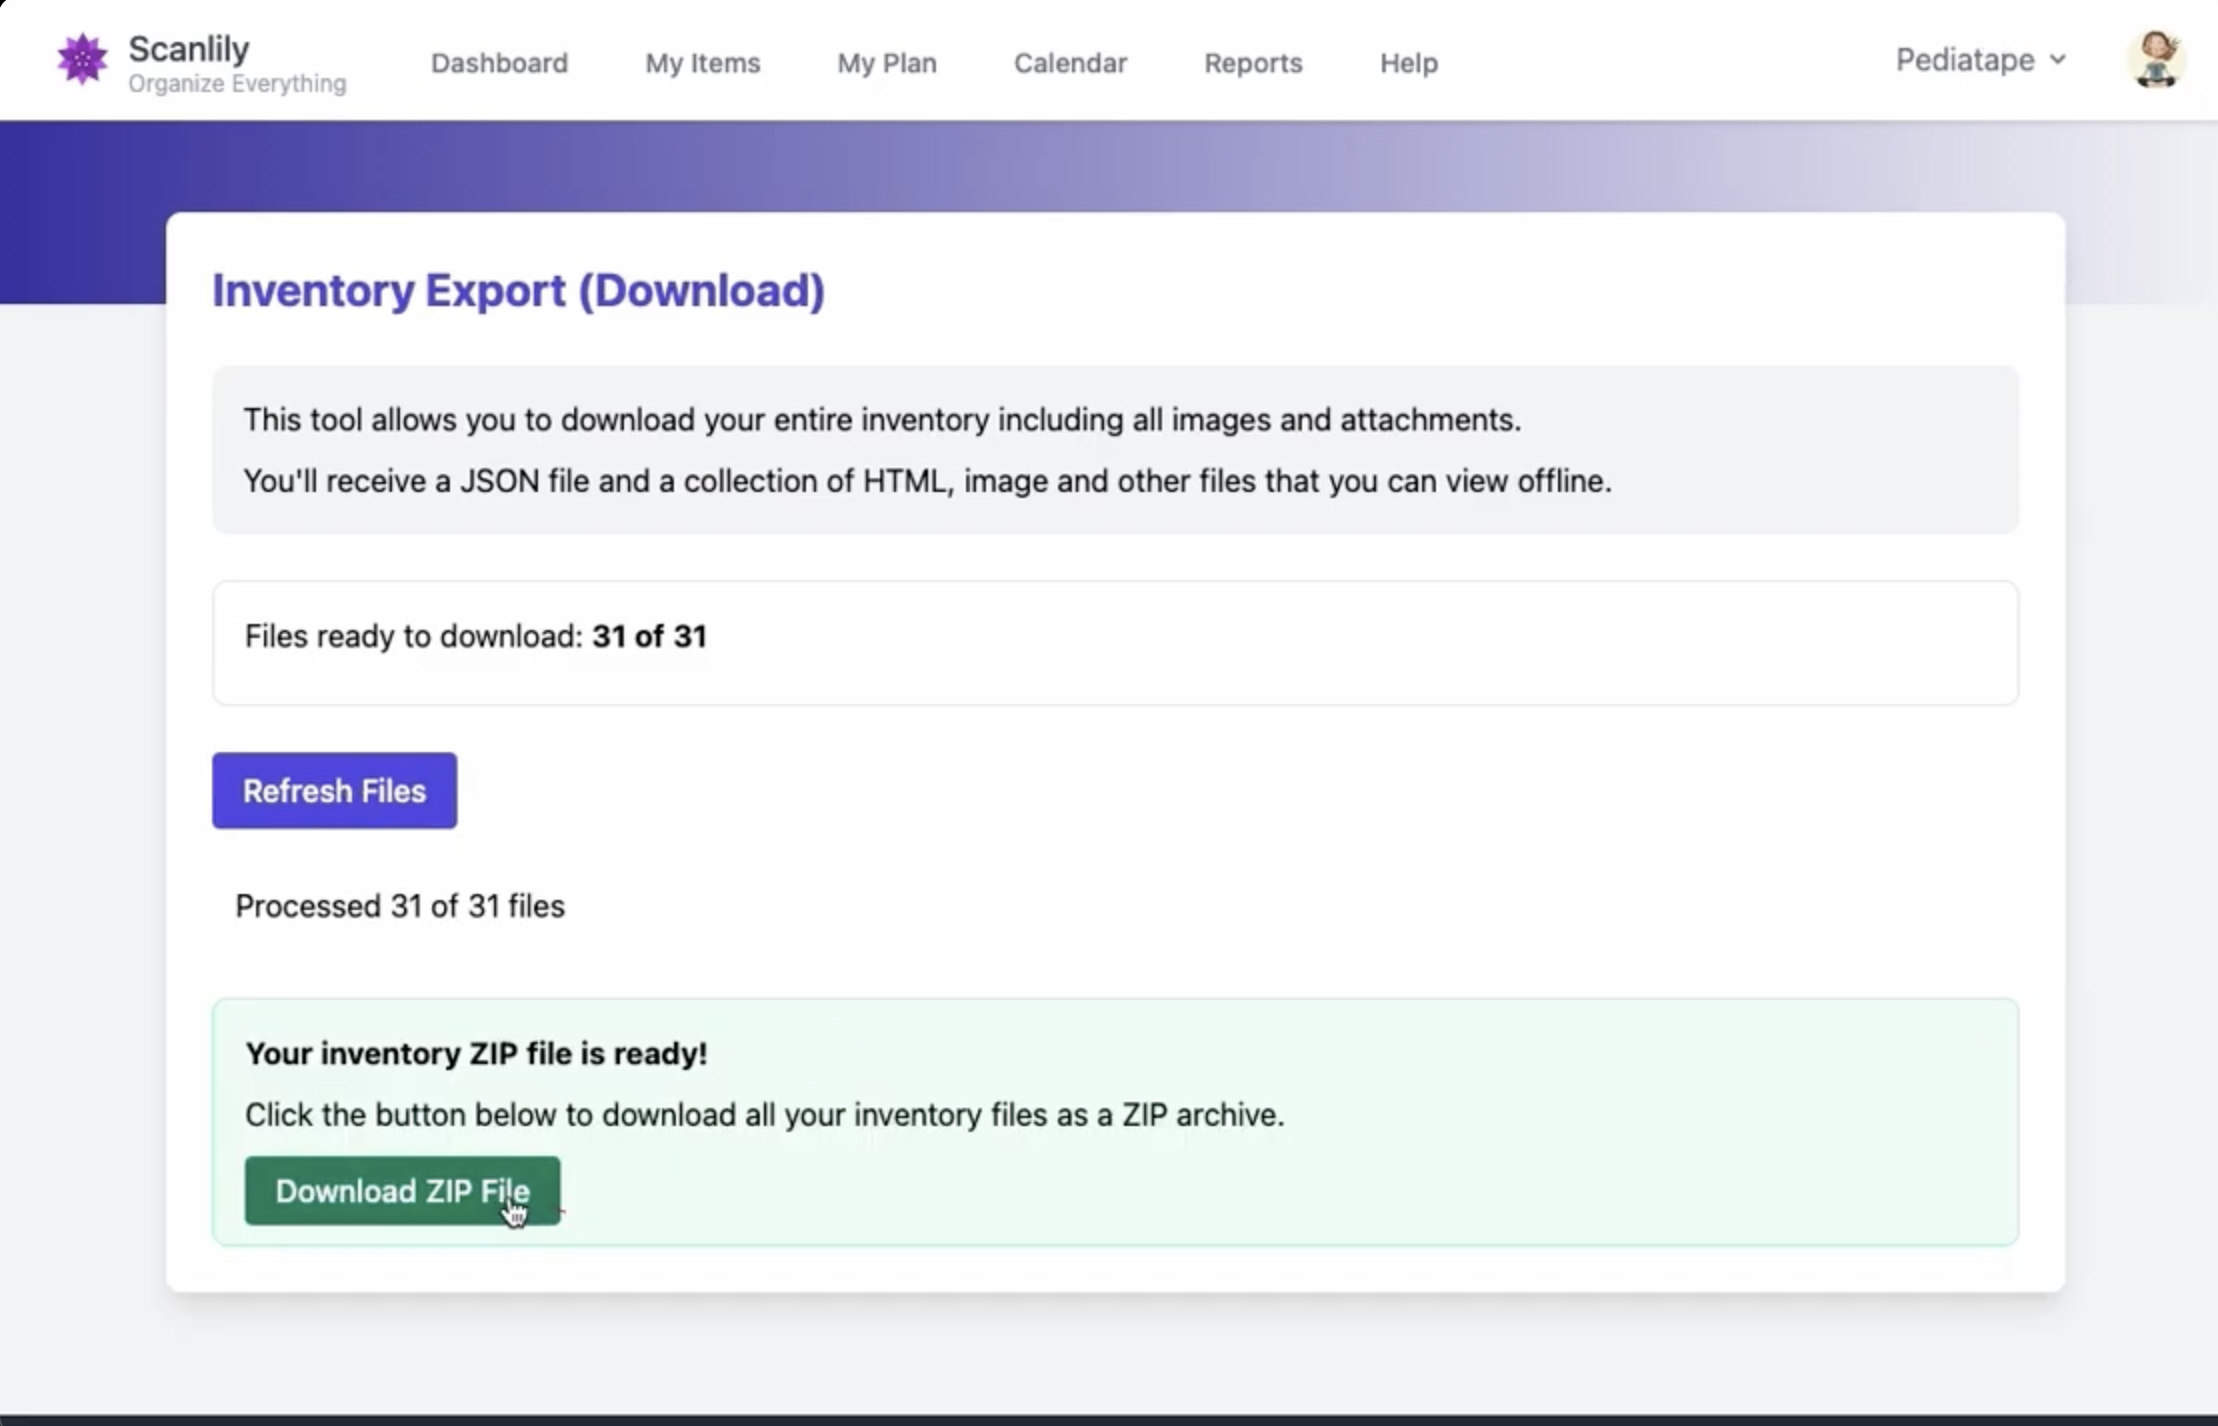
5. Once processing is complete, click "Download ZIP File" to download your entire inventory as a ZIP archive
The system will compile all your inventory data, images, attachments, and create structured HTML pages for offline viewing.
The ZIP file contains a complete, structured copy of your inventory:
Folder Structure:
/image/ - Contains all item images
/attachment/ - Contains all file attachments
/audio/ - Contains any audio files
/details/ - Individual HTML pages for each item
inventorypages.html - Main inventory browse page
inventory.json - Complete data in JSON format
2b. HTML Export
HTML Inventory Pages: When you open inventorypages.html from your downloaded ZIP, you'll see a fully functional offline version of your inventory:
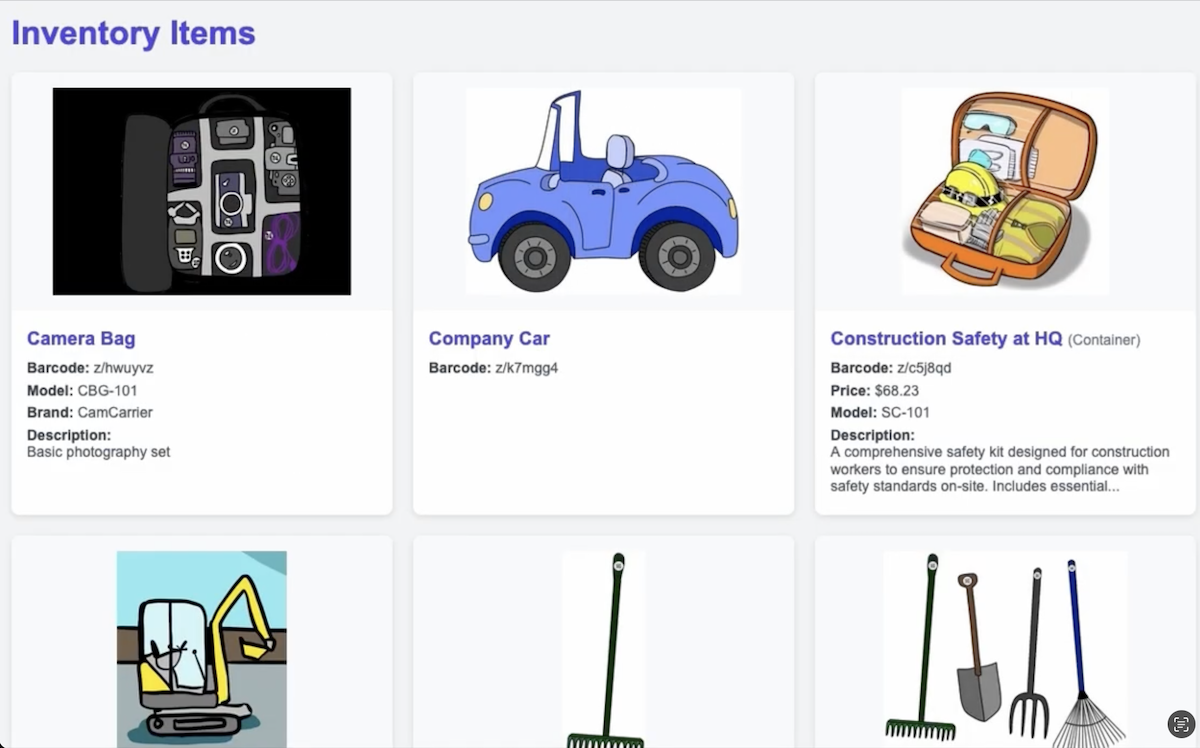
◦ Browse all your items with images
◦ Click on containers to see their contents
◦ View complete item details
◦ Navigate between pages if you have many items
◦ All images and data are stored locally
2c. JSON Export
JSON Data File: For developers or advanced users, the inventory.json file contains all your structured data:
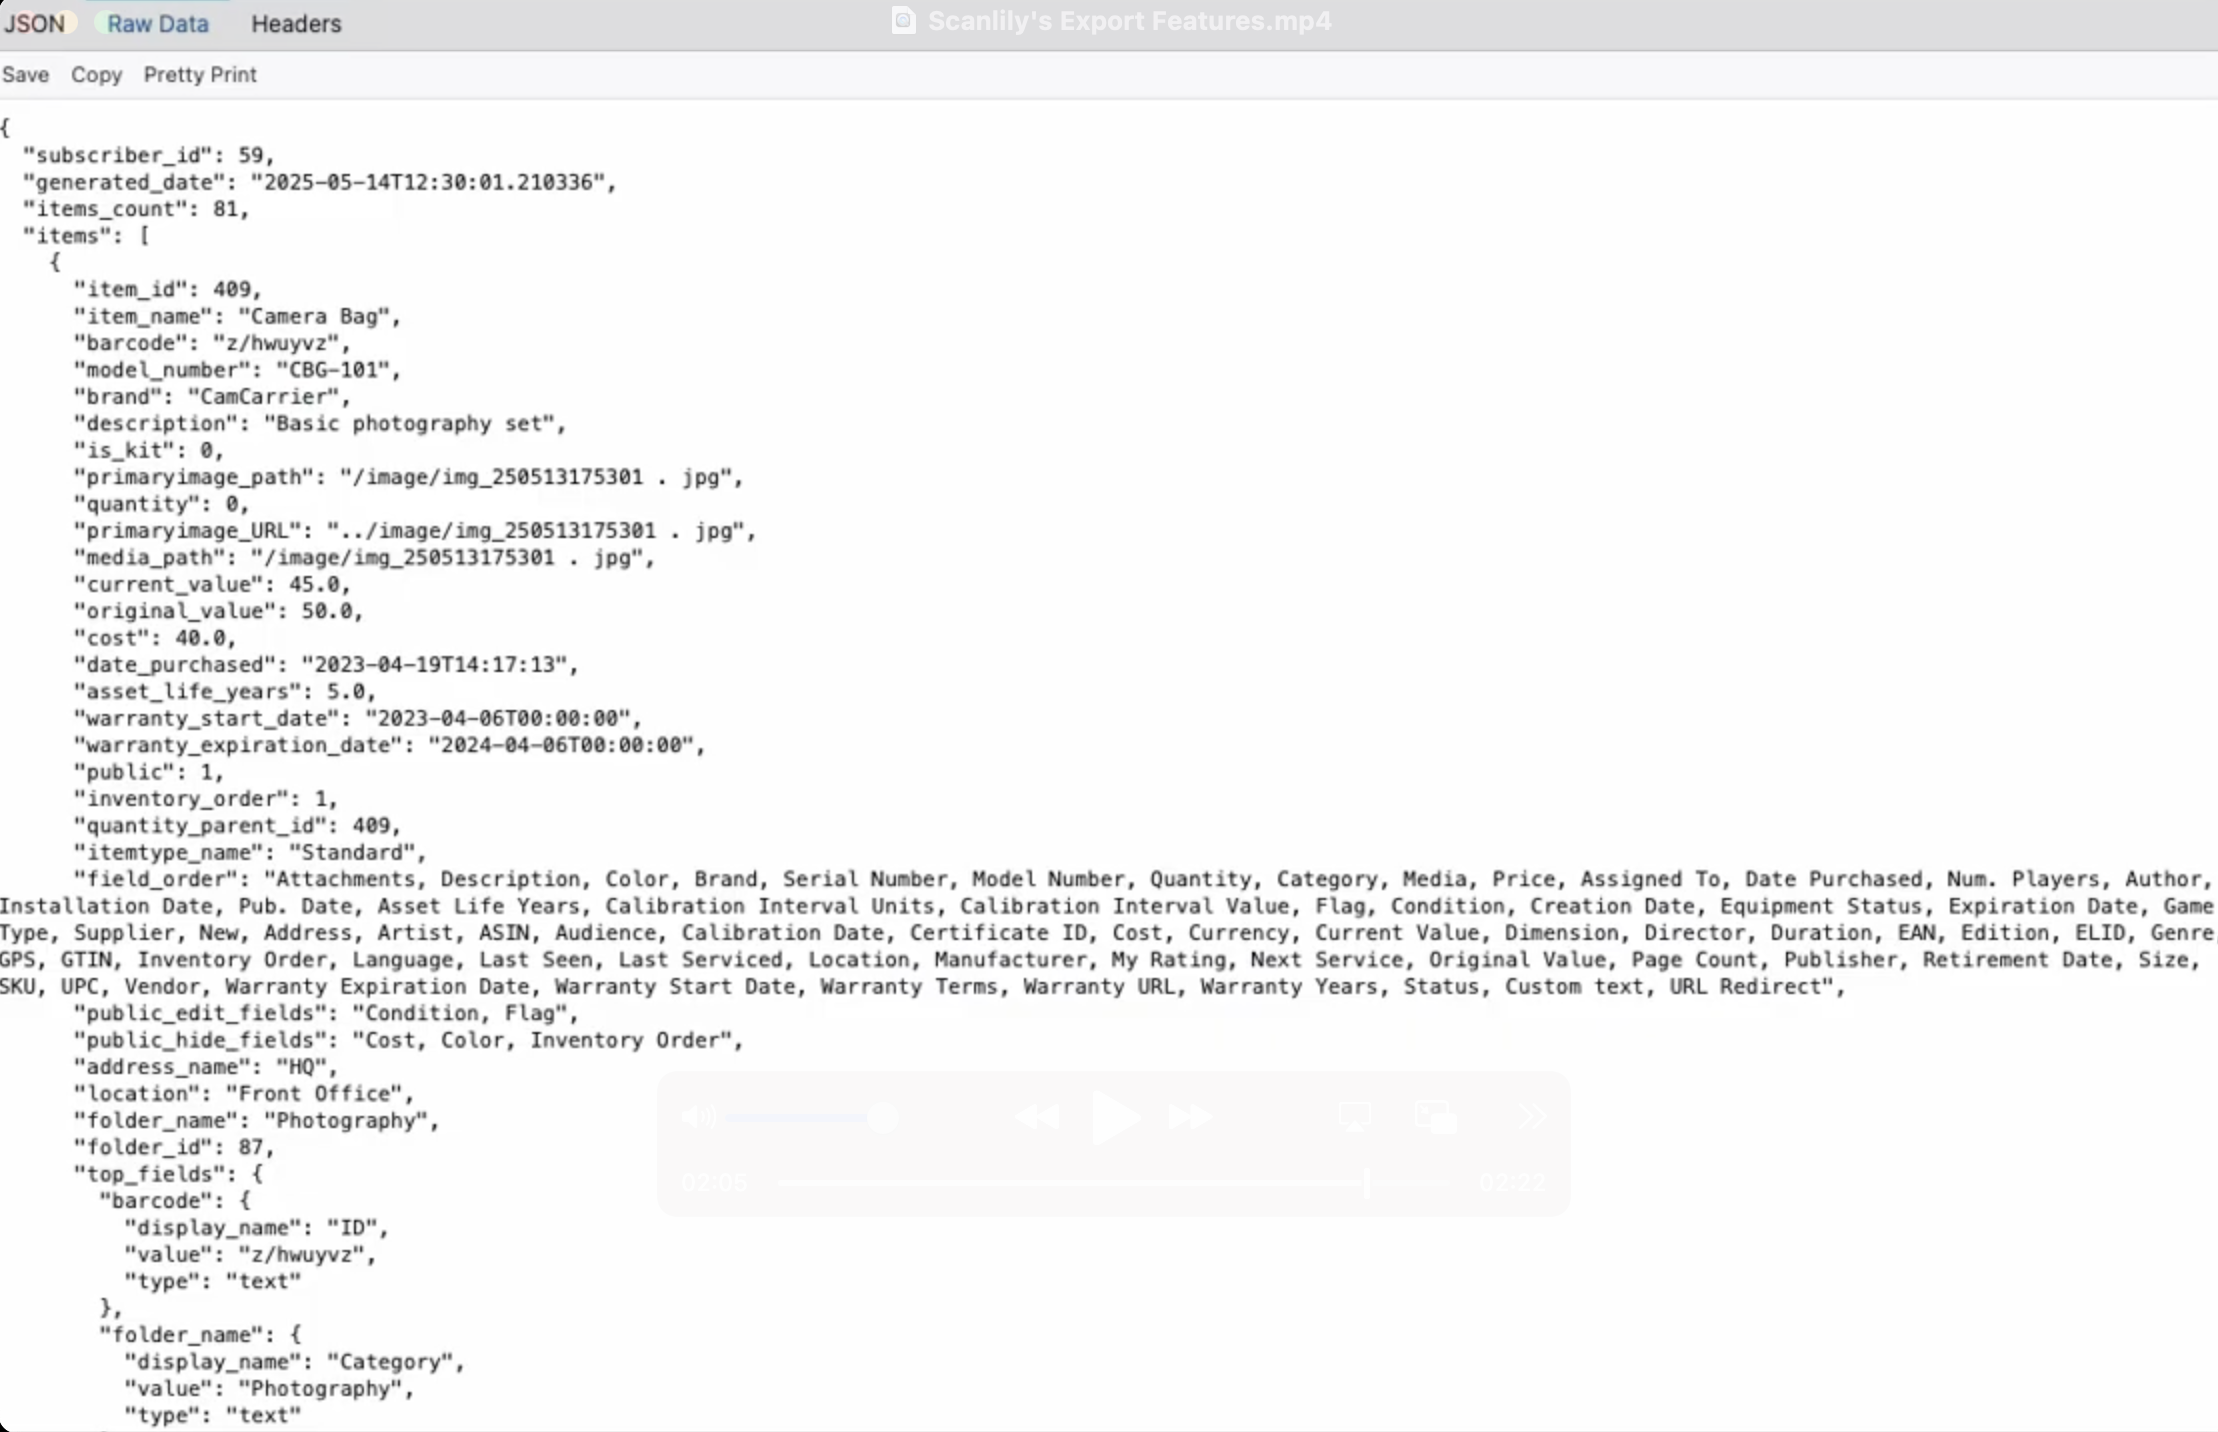
This JSON file includes:
◦ Complete item information
◦ All field values and attributes
◦ Container relationships
◦ Image references
◦ Attachment information
2d. Working with Exported Data
For Backup Purposes:
◦ Store the ZIP file in a secure location
◦ The complete folder structure preserves all relationships
◦ Can be opened and browsed offline anytime
For Data Analysis:
◦ Use the CSV export for spreadsheet analysis
◦ Import JSON data into other applications
◦ Parse structured data programmatically
For Migration:
◦ JSON format allows importing into other systems
◦ Images are preserved with their original names
◦ All relationships and hierarchies are maintained
b. Import
There is an online mechanism for importing structured data. Contact Us if you are a Business subscriber and would like to import items and we will provide you with instructions.
Changing an item's GPS location
Depending on the circumstances, one or two additional buttons may appear on the GPS popup for "Change to current location" or "Change to item's address". These create the described effect.
Changing an item to the location of the closest address
If you scan an item's QR and it has moved closer to a different address, the system will prompt you whether you want to update its address to that location: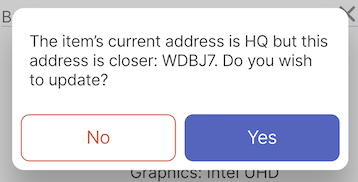
This is a useful feature for moving items from one location to another. Your colleagues can be instructed simply to scan the QR of the item being moved once it arrives at its destination. This will update its