One of Scanlily’s most powerful features is the ability to view and update your asset information in a spreadsheet. This feature is available to Free, Pro and Business users alike by logging in to the User Website.
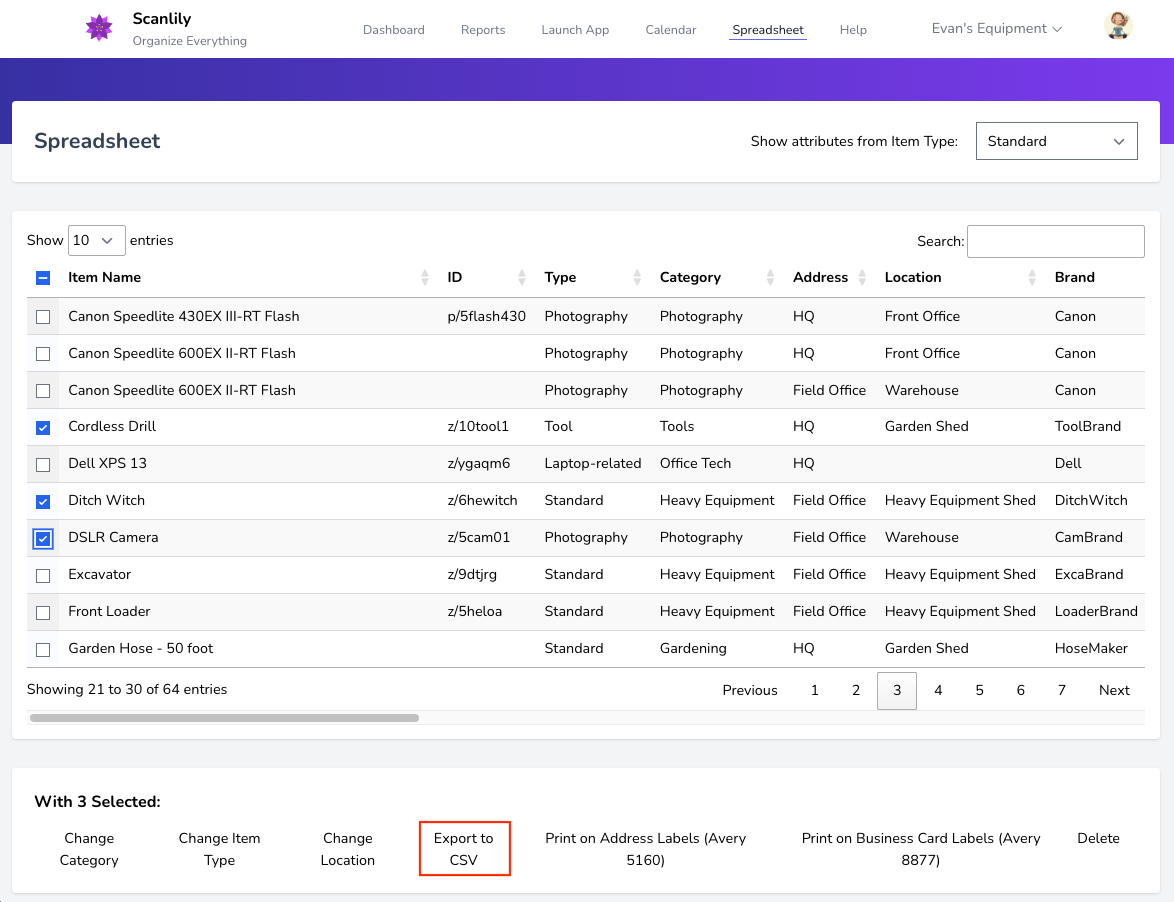
This is an example of the spreadsheet with rows selected for performing an action. For example, if you choose 'Export to CSV', a downloadable CSV can be created. Select the upper left checkbox to export all rows. Exporting is available to Free, Pro and Business subscriptions alike.
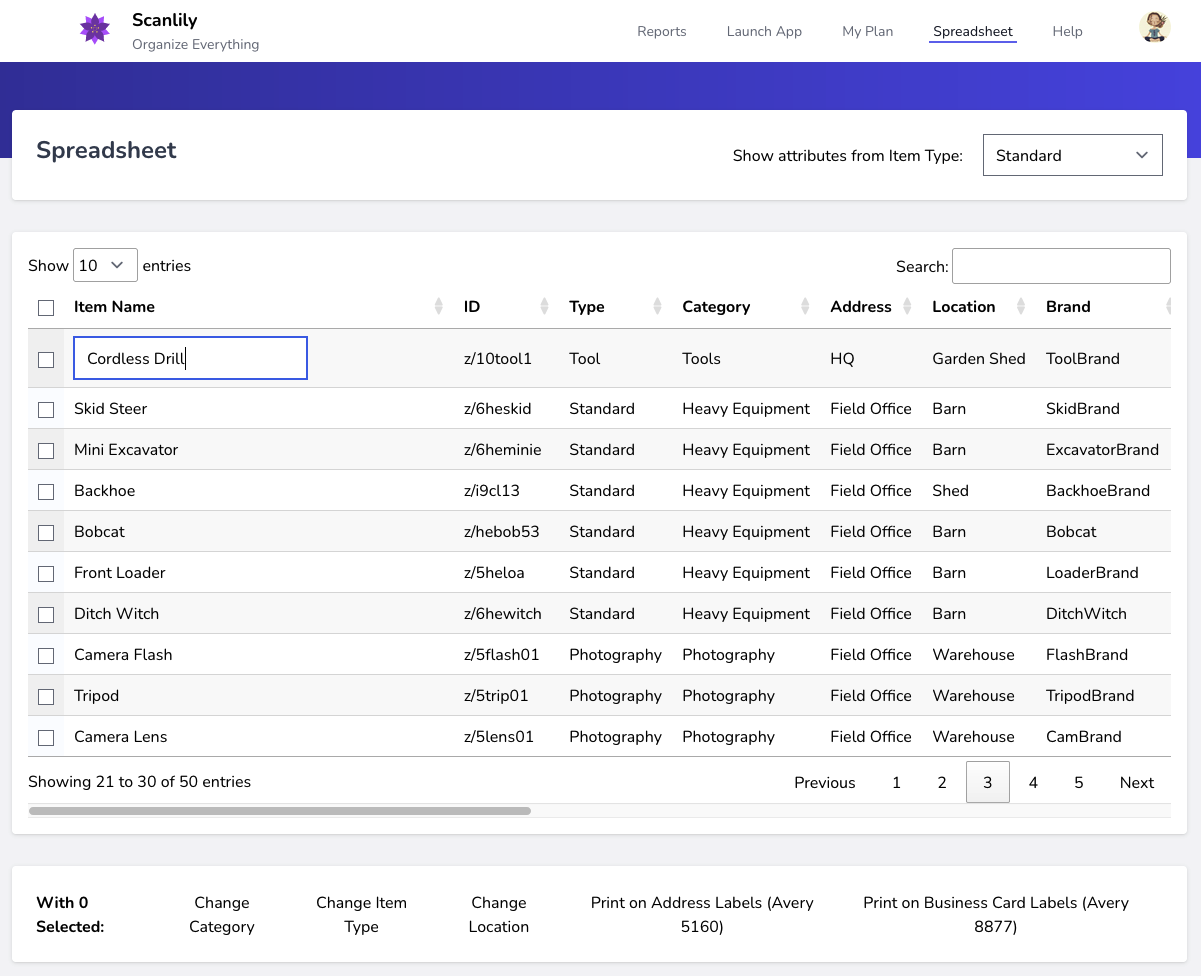
Here is an example of the spreadsheet with the name field being edited.
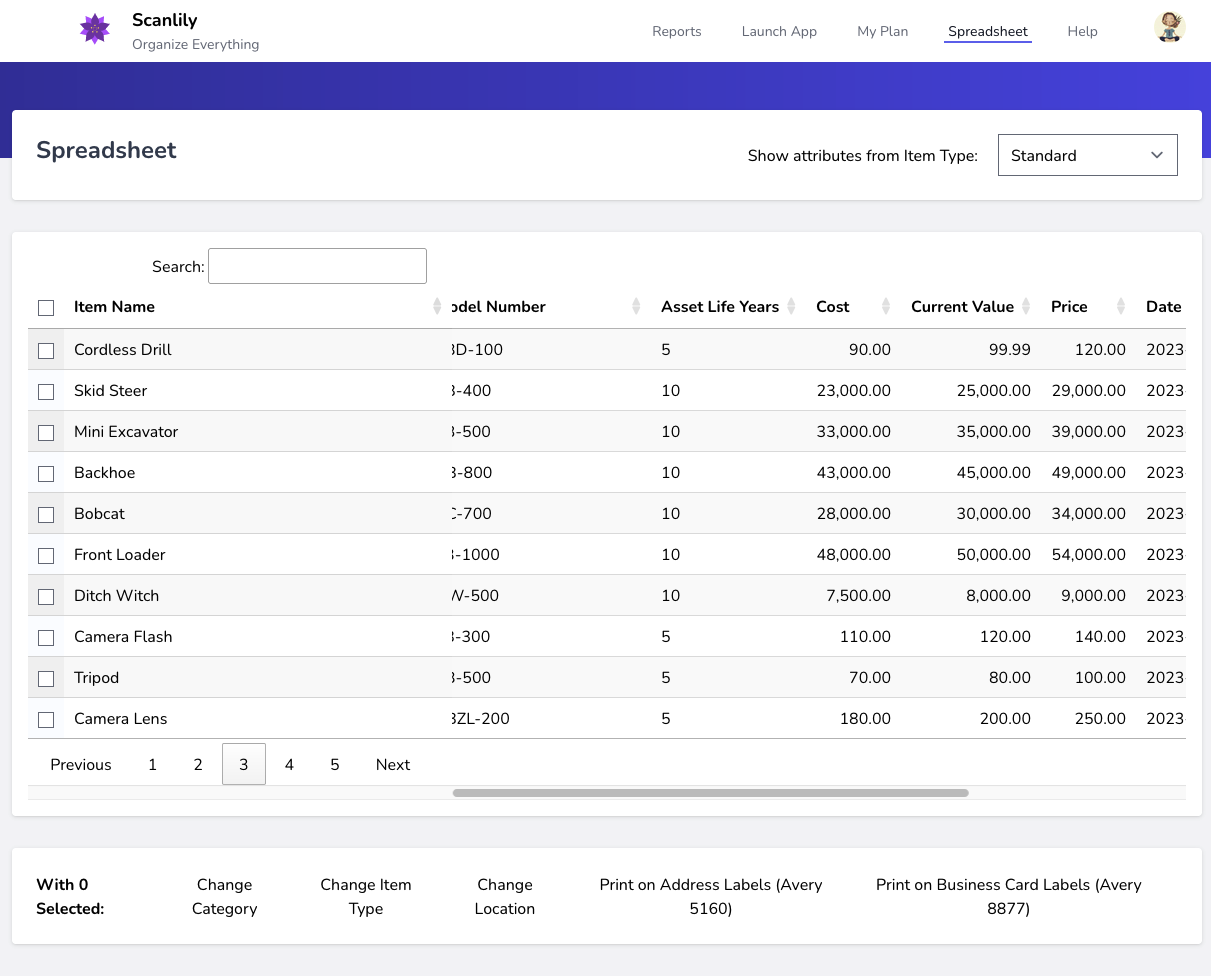
The spreadsheet’s wide format allows you to visualize more of your data together than the app. If you have a large screen, you can widen your browser window and see many fields.
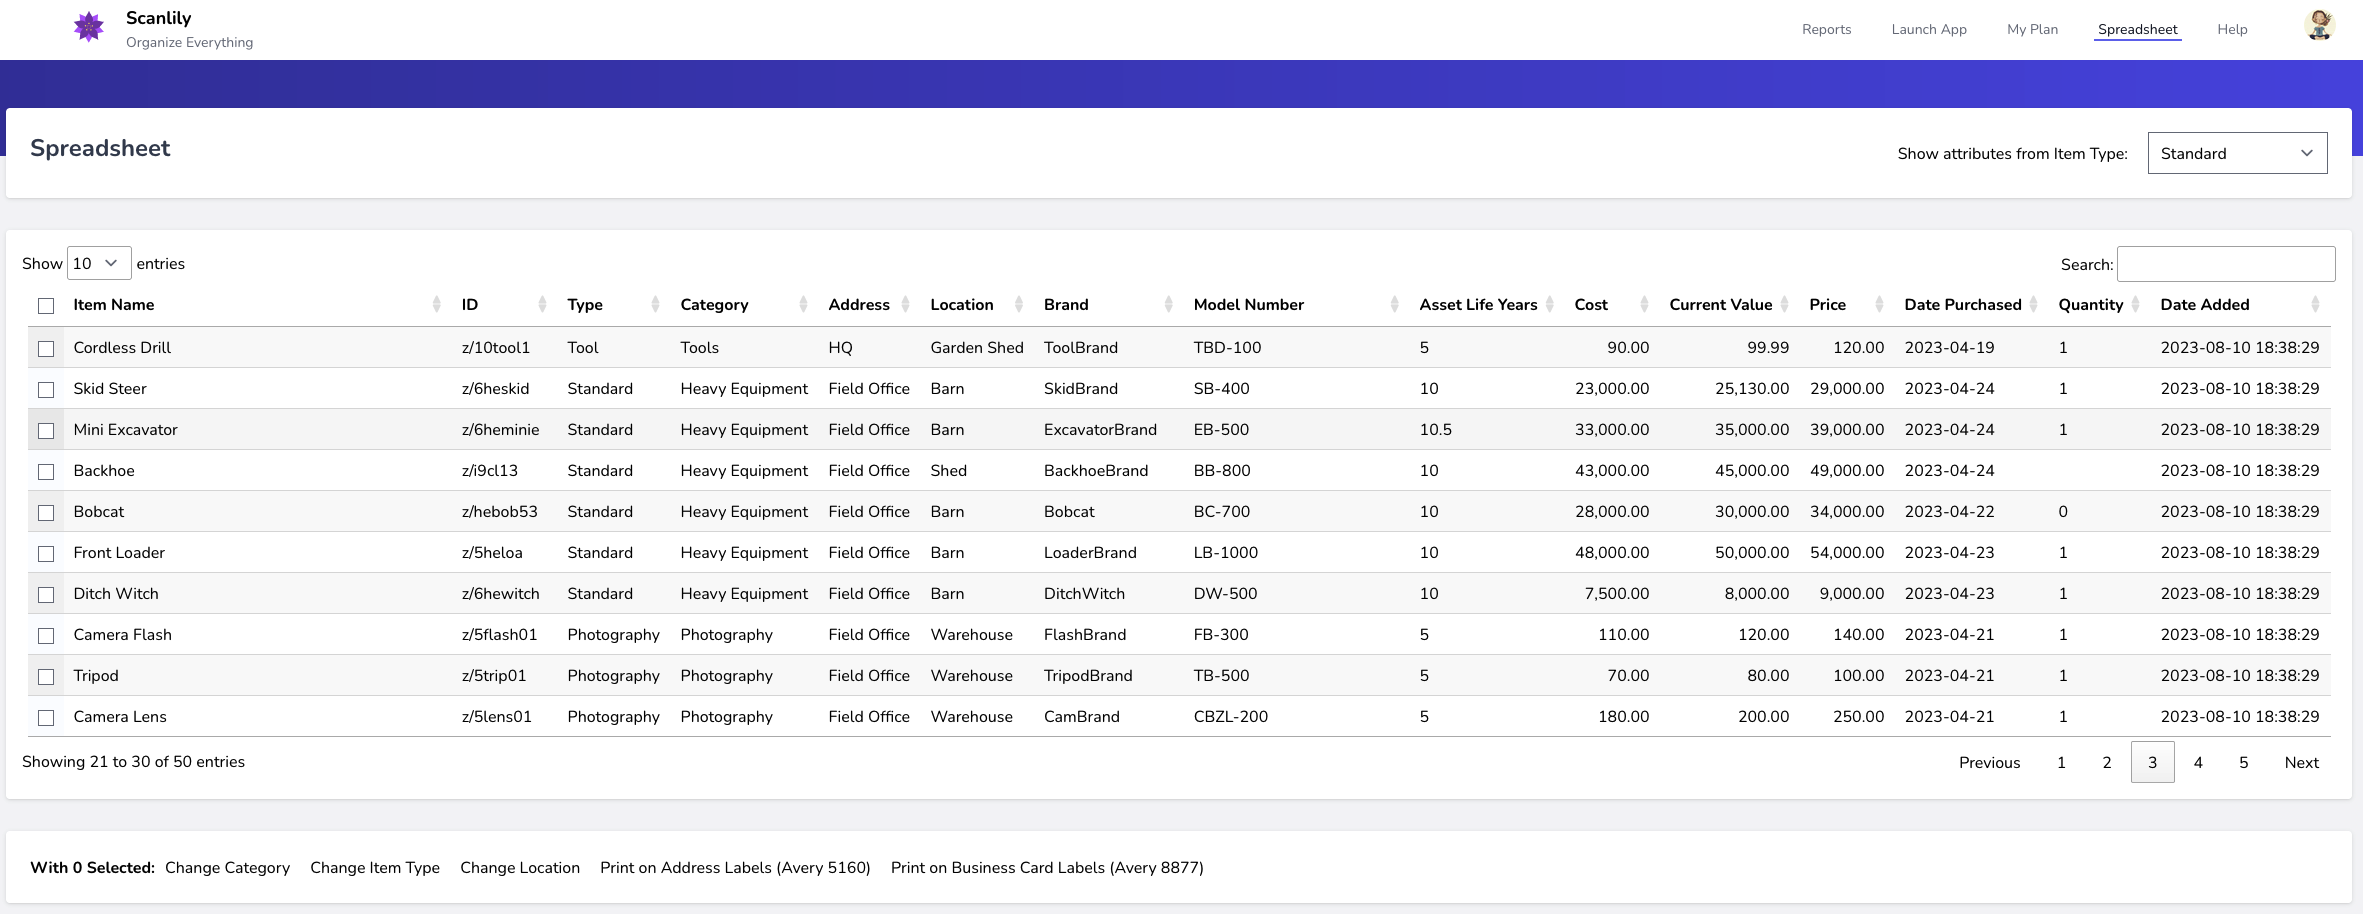
If all the fields don't fit on your screen, you can scroll to the right. The Item Name will stay in place - allowing you to see more fields to the right.
You can also specify which attributes to display on the spreadsheet by selecting one of the Item Types you have defined in the app.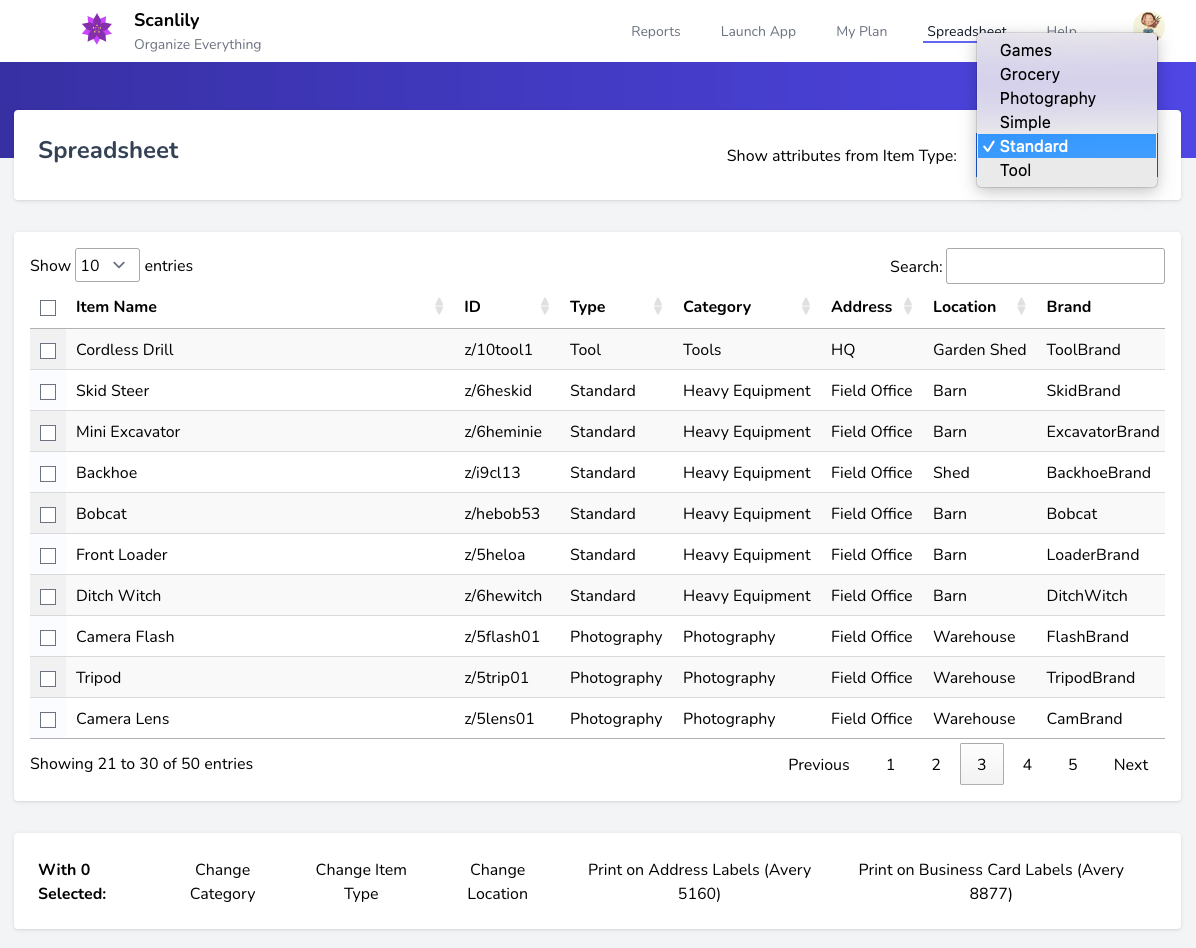
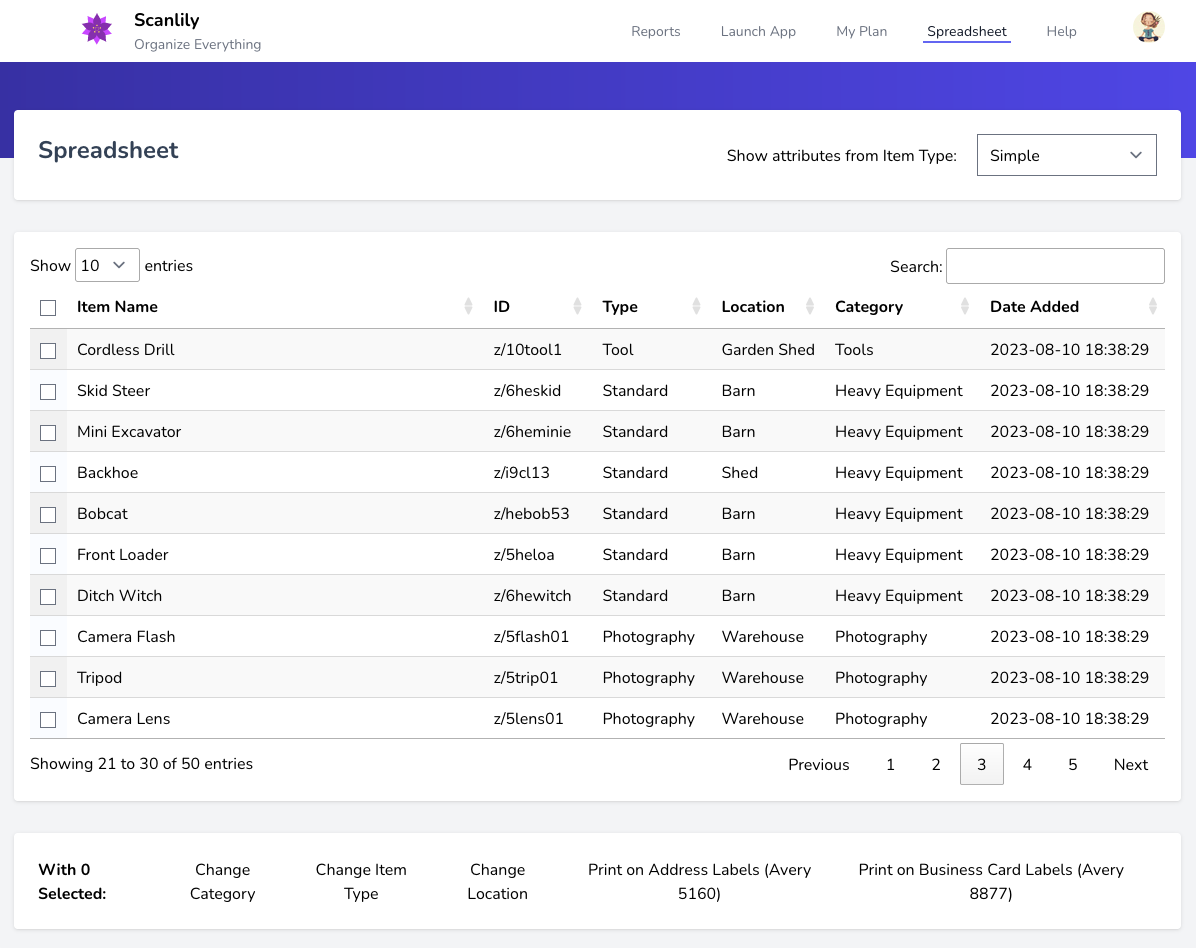
For example, the below “Simple” view (which comes standard in Scanlily), displays fewer attributes.
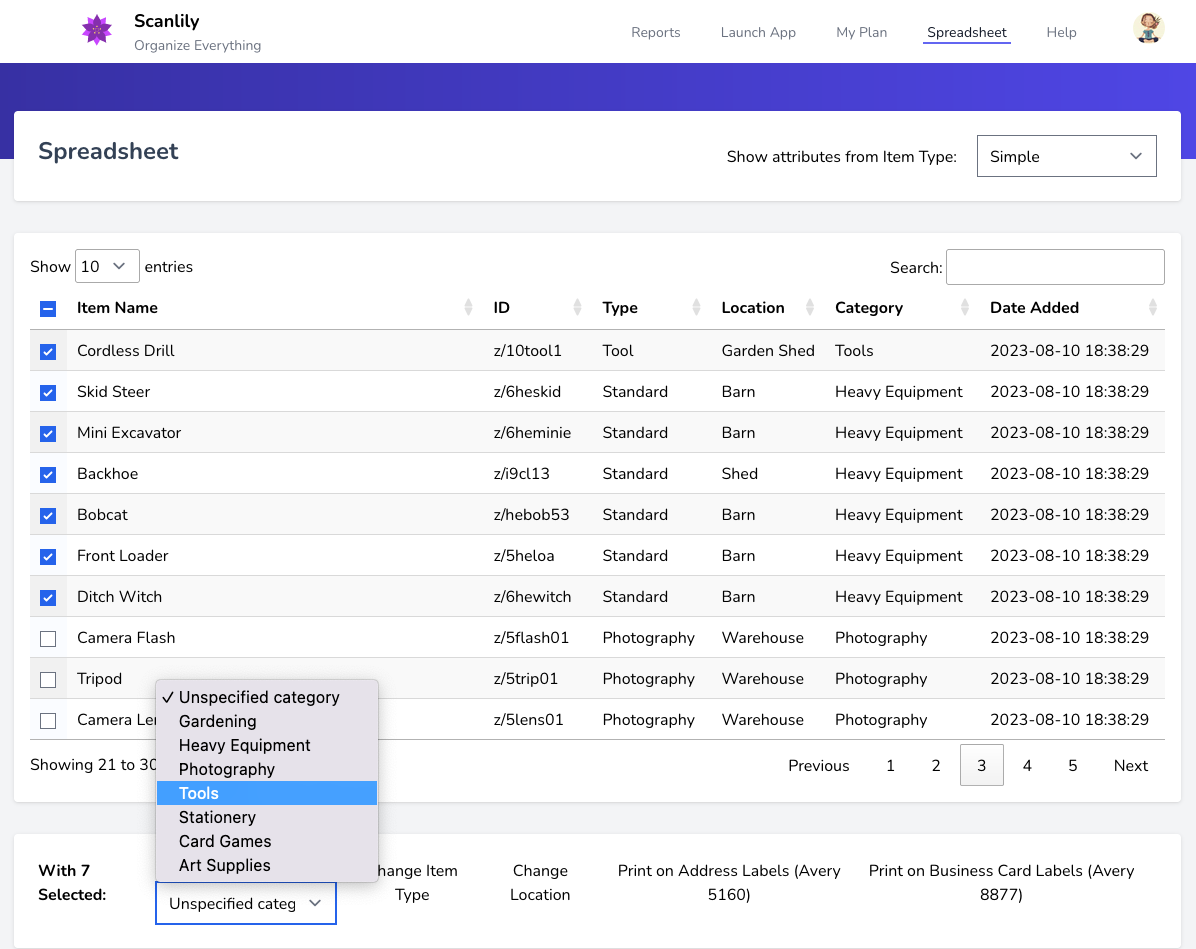
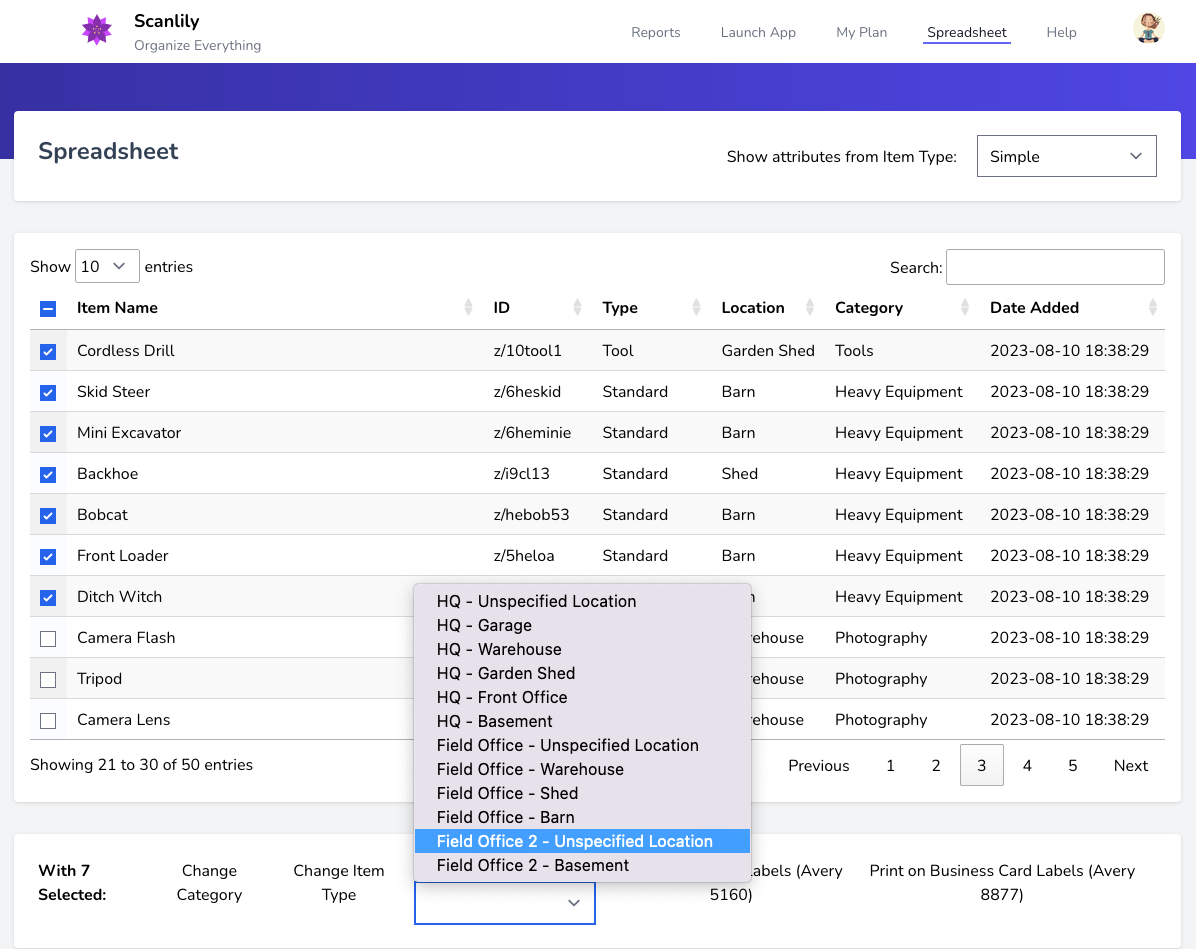
The Scanlily spreadsheet allows you to select rows and perform bulk actions. For example, you can update the category for multiple items at once like below.
Pro and Business users get to define multiple addresses. Therefore, the Location pulldown will allow you to select the location from amongst each of your addresses.
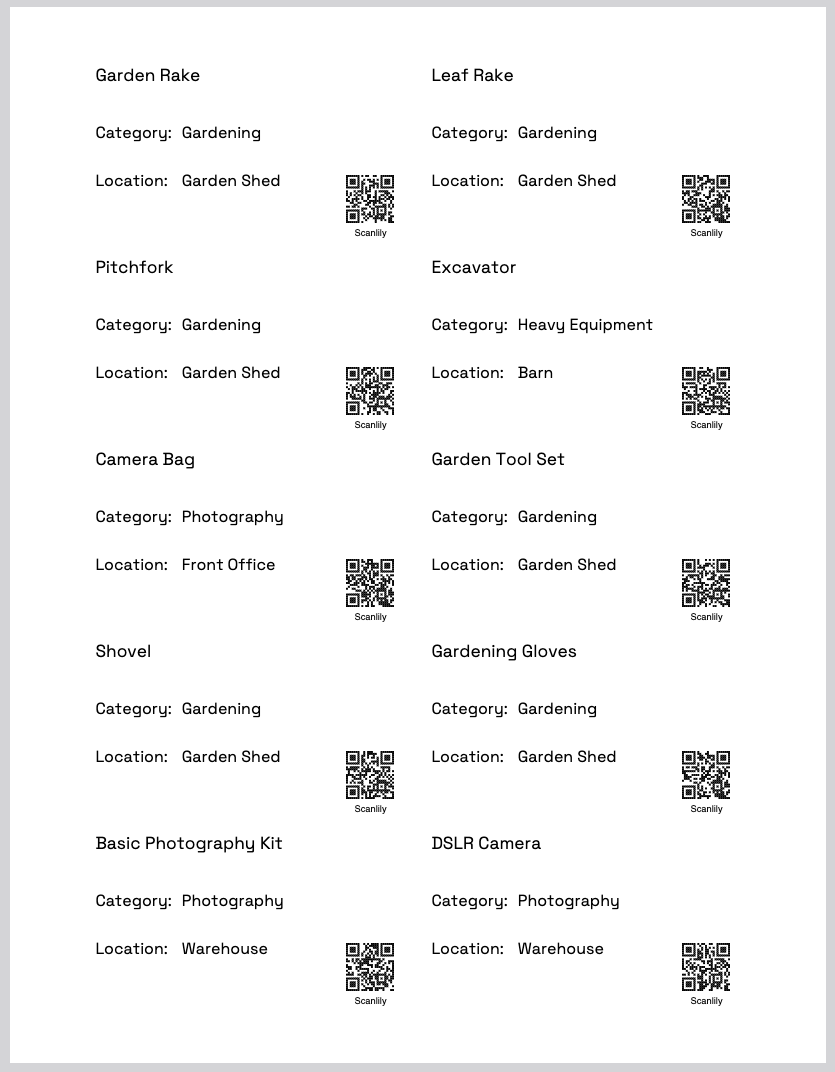
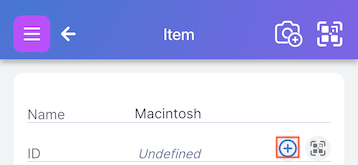
Used in combination with the + symbol that Pro and Business subscribers can use to generate QR codes in the app, you can create and print out new QR labels in this manner without needing to purchase physical Scanlily QR labels upfront.
The Address label size prints on standard 1” x 2 ⅝” address labels (Avery 5160 and other same-sized formats).
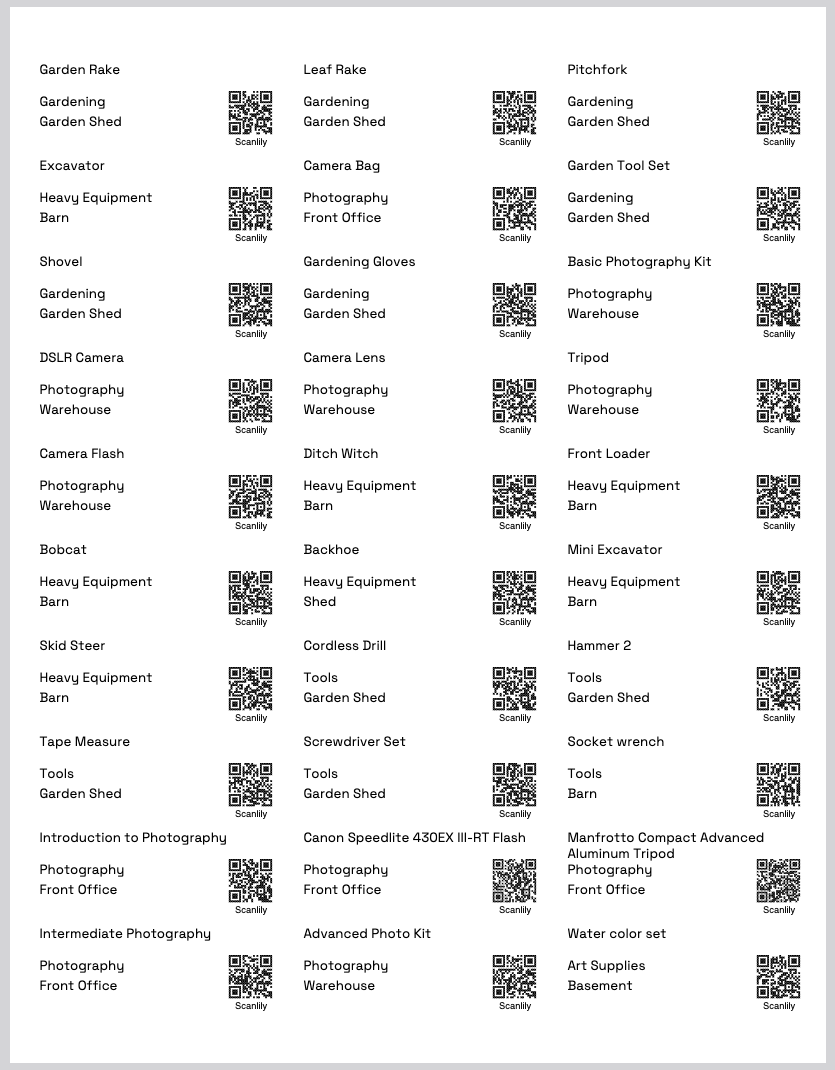
The Business Card labels prints on standard 2” x 3.5” labels (Avery 8877). These are larger and therefore even more readable for placement on storage containers.