
On this page
Scanlily's Aisle, Bay, and Shelf fields allow you to specify location codes to each item. Instead of searching through entire storage areas or creating custom containers for every shelf, you can now document precise locations like "Aisle 7, Bay 2, Shelf B" directly in your Scanlily item records.
The best part? When you record a video walkthrough of your inventory, Scanlily's AI can automatically detect aisle, bay, and shelf labels or capture them when you mention them verbally. Scanlily's Aisle, Bay, and Shelf fields are also fully searchable and are included in your inventory reports, making it simple to pull up everything stored in a specific location.
Here's how to use it now:
On your mobile app
Step 1: Add the Aisle, Bay, and Shelf fields
On the Scanlily Item page, click the three-dot menu at the bottom right of the screen and then click 'Add or Remove Fields' to access your list of attributes: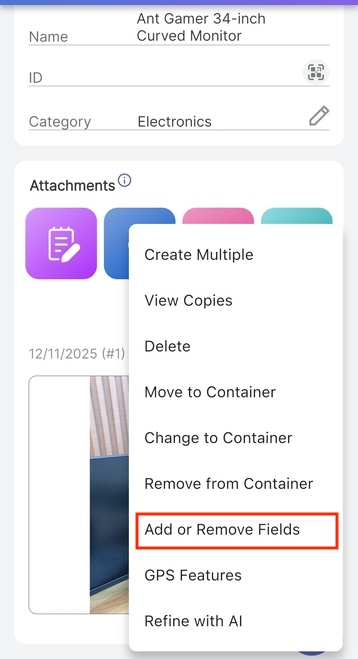
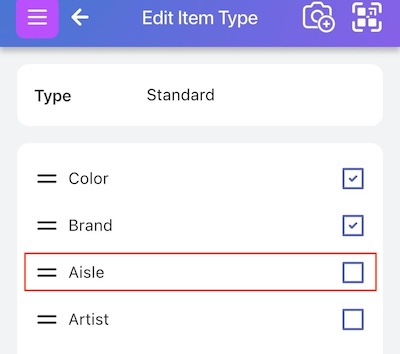
To each item or container you're tracking with Scanlily, you can add dozens of fields and the Aisle, Bay, and Shelf attributes are part of them.
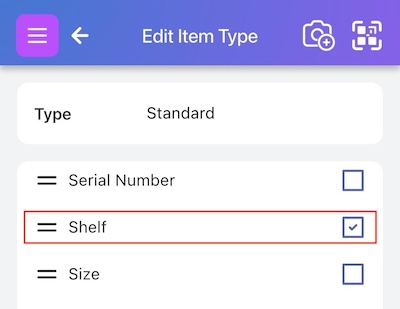
Check the Aisle, Bay, and Shelf boxes to enable them for your item and click 'Save':
Step 2: Specify your aisle, bay, and shelf values
After saving the fields, you'll be redirected to the item page and the Aisle, Bay, and Shelf fields will now be visible.
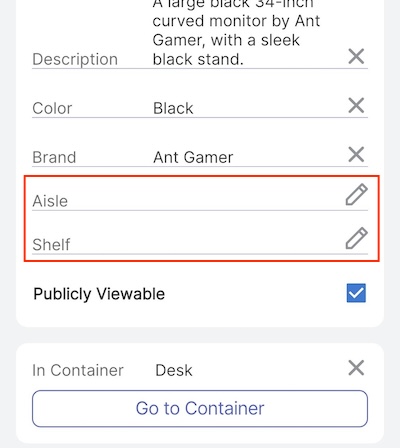
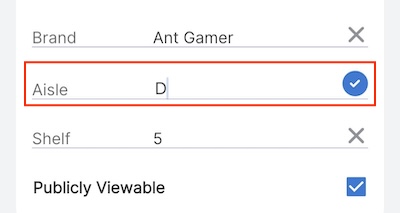
Click the 'pencil' icon beside each field to set the value. If you run a numerical-based tagging system, specify the aisle number to match the aisle in your warehouse you'll be placing your item in, e.g. '5' to match 'Aisle 5'. And if it's letter-based, specify it using the right labels.
Do the same for your shelf labels and click the check button beside the field to save it:
Things to note
Consider the Aisle, Bay, and Shelf attributes as extensions of the location field. You no longer just know it's at 'this warehouse' or 'that site'... you know exactly where it is at that location
You can enable the Aisle, Bay, and Shelf fields for not just items but also containers! Click the three-bar menu at the top left and click My containers to see your container list, then follow the exact same steps to set the values. Any items you add to that container will inherit its aisle, bay, and shelf values automatically.
These fields create a hierarchy that allow you to find items conveniently in this order:
Address ➤ Location ➤ Aisle ➤ Bay ➤ Shelf ➤ Container ➤ Item
Scanlily captures the aisle, bay, and shelf values while creating an item or container with video
Scanlily is the first of its kind inventory tool that allows you to add an item or container to Scanlily using video walkthroughs.
Instead of manually filling in your inventory with details of each of your items (for a warehouse, this can be in the thousands), you simply take a video of your items or containers, and Scanlily's AI will automatically recognize each item, create an entry for each (description, brand name, color, etc.) and also compile several photos from different angles.
When recording a video of your items, Scanlily will also listen to your voice to pick up any item details you mention, so you can describe items while you record or mention the exact count, say, the number of Band-Aids in a pack.
You can mention the aisle, bay, and shelf values while recording items and Scanlily will automatically add these to your item pages. And if the Aisle, Bay, and Shelf are written on the items physically, the AI can also pick them up, saving you the time of manually inputting them.
Searching for items using Aisle, Bay, and Shelf
We have also added the Aisle, Bay, and Shelf fields as one of the filters on your items list page. Click on the 'Search' tab at the top of the item list page and filter the results by clicking Aisle, Bay, or Shelf, in any combination, and setting the values:
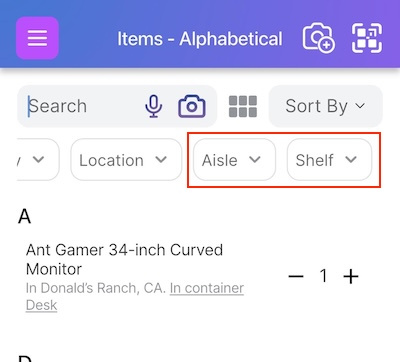
Now, only items with the specified Aisle, Bay, and Shelf values will be shown to you!
Exporting inventory sorted by Aisle, Bay, and Shelf on the web app
On the Scanlily web app, we have also added a new tab under 'Reports' that allows you to export your inventory classified by Aisle, Bay, and Shelf values, with their images attached.
Step 1: Login to Scanlily on the web app
Login to your Scanlily account on the web app at Scanlily.com
Step 2: Access Reports
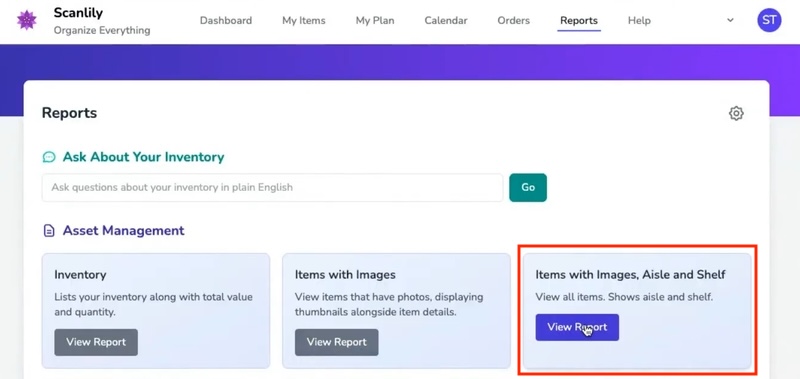
Click on the Reports tab in the menu at the top and then click 'View Report' under the 'Items with Image, Aisle, Bay, and Shelf' tab:
You'll then see your items categorized by aisle, bay, and shelf, and also their images attached to the right of each row.
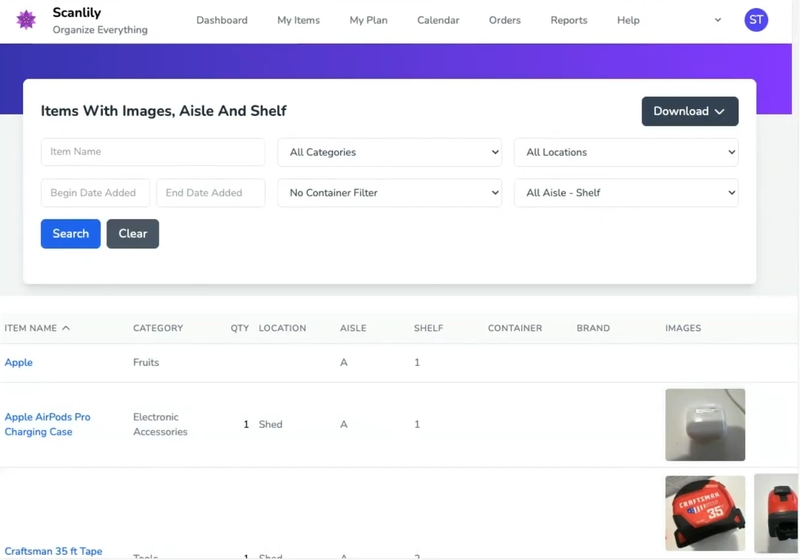
We have also made it so that you can see all the photos attached to each item at a glance, rather than having to scroll through them.
Click on the 'Download' dropdown and choose which format to download the report in 'CSV, Excel, or PDF' and then click 'Download PDF' to have it shipped to your email.
That's it!