On this page
Add Items with AI and QR
To use Scanlily, simply put a QR sticker on your item, take photos and review AI's draft description and categorization. Then edit further as needed.
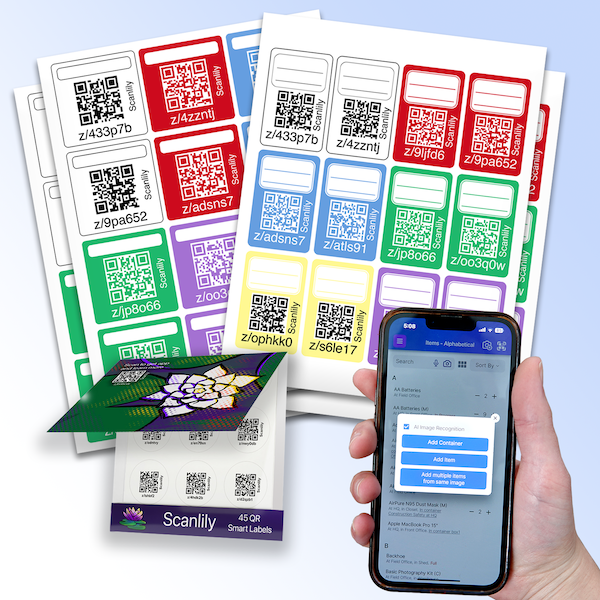
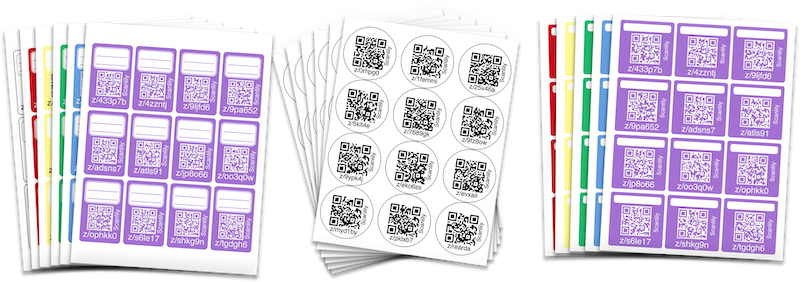
Obtain QR labels
Start by purchasing a packet of Scanlily QR labels on the Amazon or Walmart online stores. Or you can buy directly from the Scanlily website.
Or if you want to evaluate Scanlily before you buy anything, you can also scan or print free test labels from our website.
These expire after two weeks but you can use these to test the system while you wait for your order from Amazon or Walmart.
Using QR labels
Once you have your label packet, remove a QR label and put it onto your item.
Open up the app and click on the upper right Scan button.

Then Scan the QR code to get the item into the system.
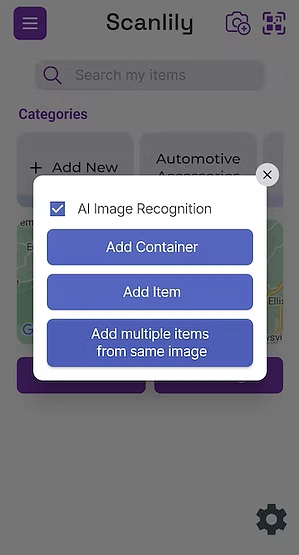
Choose mode
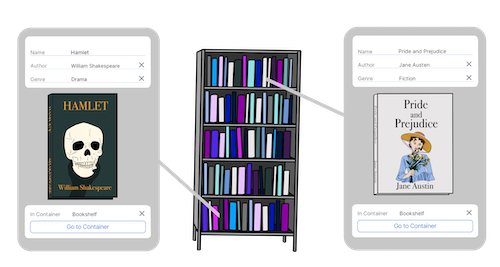
Choose whether you want to add an item or a container, and whether you want to use AI image recognition. Pro and Business subscribers can choose to take one picture and generate multiple item records. For example, you can take a picture of part of a bookshelf and have Scanlily itemize and describe all the books it sees.
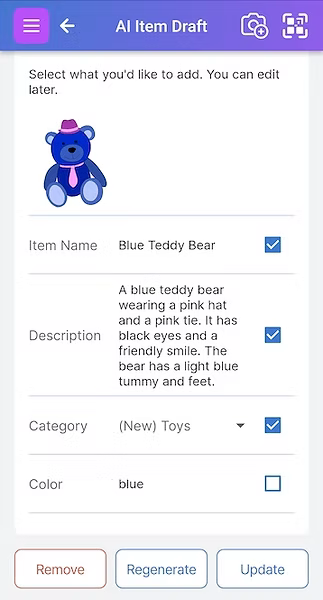
Add more photos, more items or review draft
AI suggests fields and drafts wording. AI also selects an existing category or proposes a new one. Select what you'd like to apply to your item.
Edit your suggestions further on the Item Page. At this point, you can optionally scan a QR sticker and add a QR by clicking on the button next to the ID field.
There are dozens of standard fields to pick from. You can group fields into Item Types for different types of items.

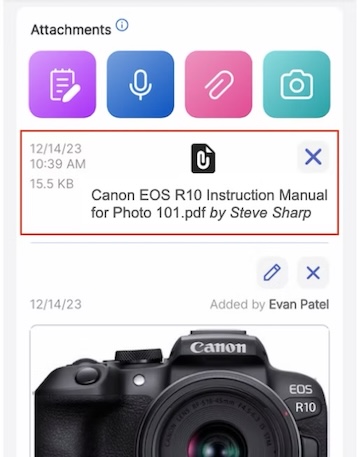
Add attachments
The Attachments area allows you to attach photos of the item, as well as notes and documents. You can post as many pictures or add as many notes as you want to each item or container. You can also have multiple users attaching different notes and pictures about the item as kind of an ongoing, timestamped, conversation. Their names will then appears in this thread.
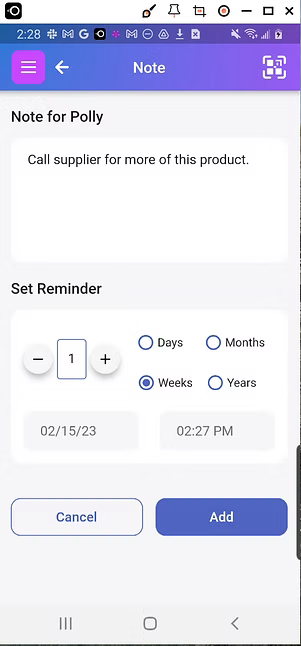
Note and Reminder Attachments
You can even set a reminder that causes an email to be sent back to you.
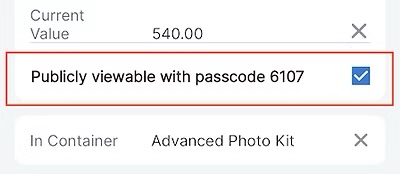
Share Item
You can set a QR code to public. Then, when someone else scans again, then they can see information about the item in their web browser. You can set a passcode to add an extra level of security. No app is needed!
Three ways to scan a Scanlily QR code:
Scan button
Scan the QR using the app's Scan button in the top right corner of the screen.
Phone camera
Scan the QR with the phone's camera with the app installed. It will open the app to that item.
Scan without the app!
Infrequent users don't even need to install the app! They can just scan a QR with a phone's camera and a web page will open showing that item. This is view-only. If you want to change anything about the item or add items, then first log in either via the app or the web system.
Get Ready to Organize, Track and Reserve Everything with Scanlily